01
Background
This is my personal workstation. I currently use 3 Displays, running off of Mini Displayport to VGA Adapters. All screens are 1920x1080. I am much more efficient working with multiple monitors and I handle multi-tasking very well. The base of it is 3D Printed to allow more air flow underneath the laptop and keep components cool. I use external peripherals so my computer barely experiences any physical wear on the chassis, touch pad, speakers, keyboard, etc. I hope you enjoy this project as much as I appreciate it every single day.
02
Photos
Here I'm printing out 90-degree right angle brackets. These have 2 Mounting screws into the wood surface as well as 1 central hole. Same brackets are used on my Mendel90 and Outdoor Stereo Project
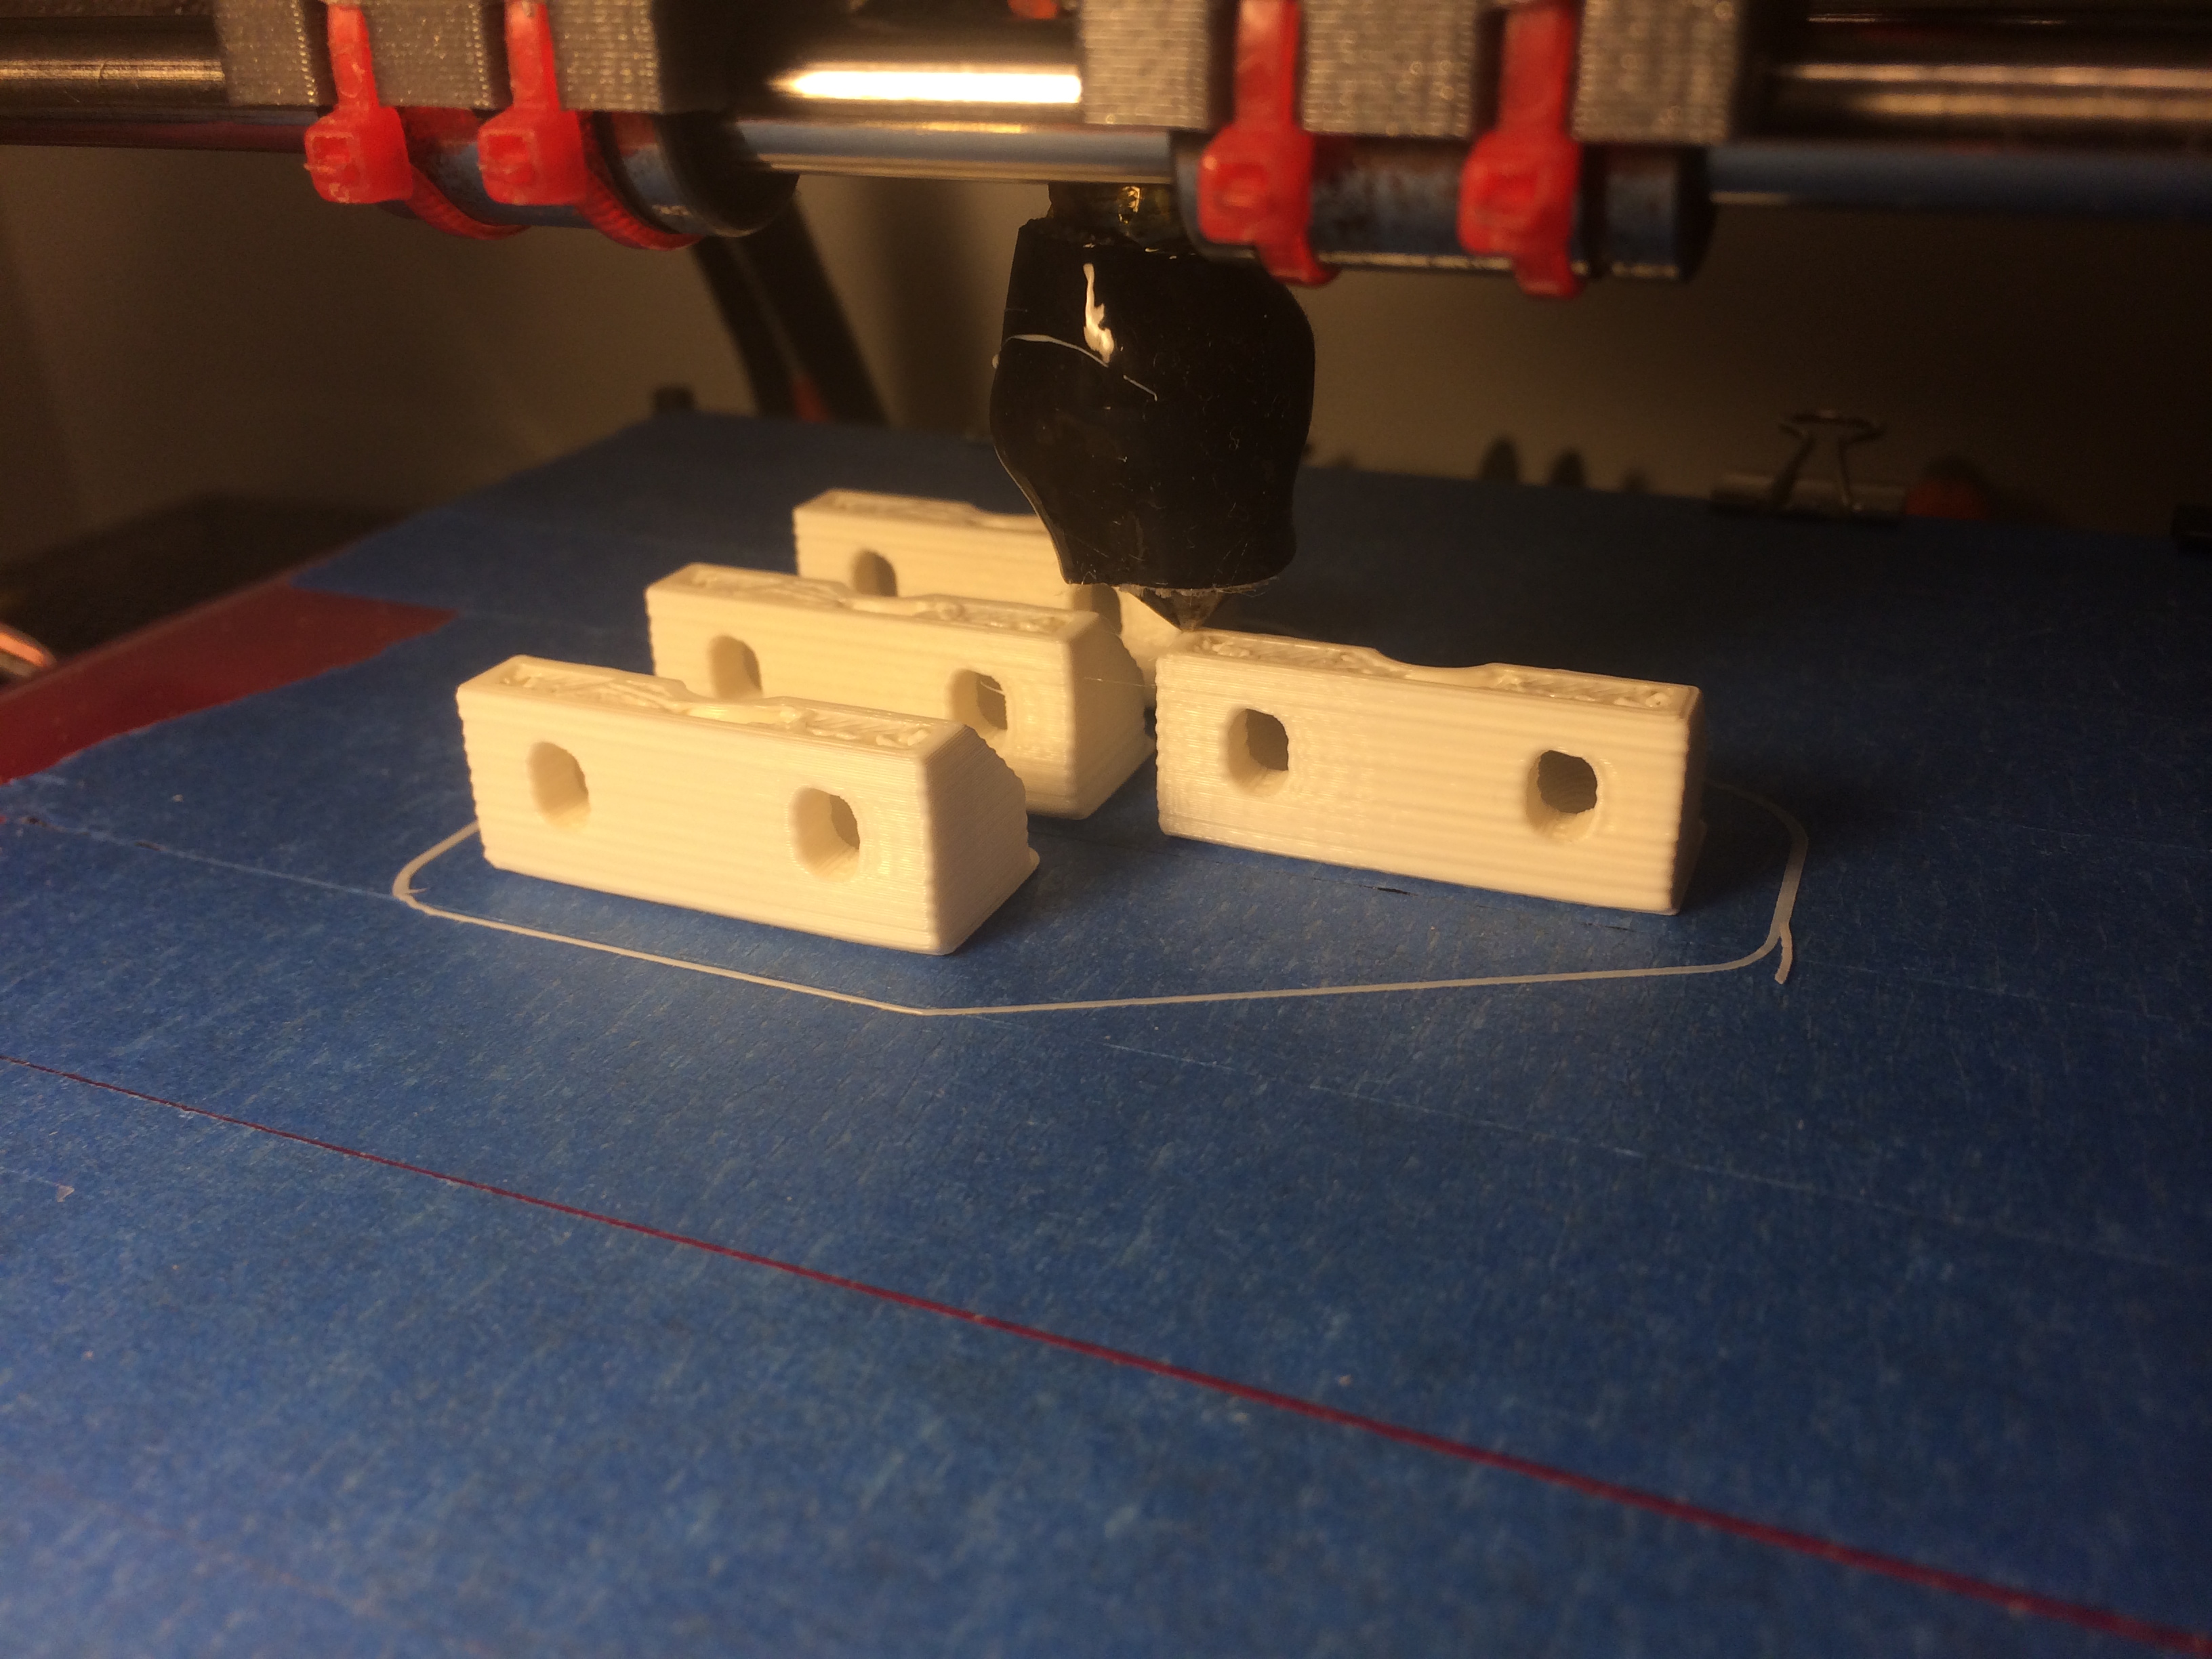
Here I'm printing out 90-degree right angle brackets. These have 2 Mounting screws into the wood surface as well as 1 central hole. Same brackets are used on my Mendel90 and Outdoor Stereo Project
These are the right angle brackets that will hold the closing-edge of my laptop.
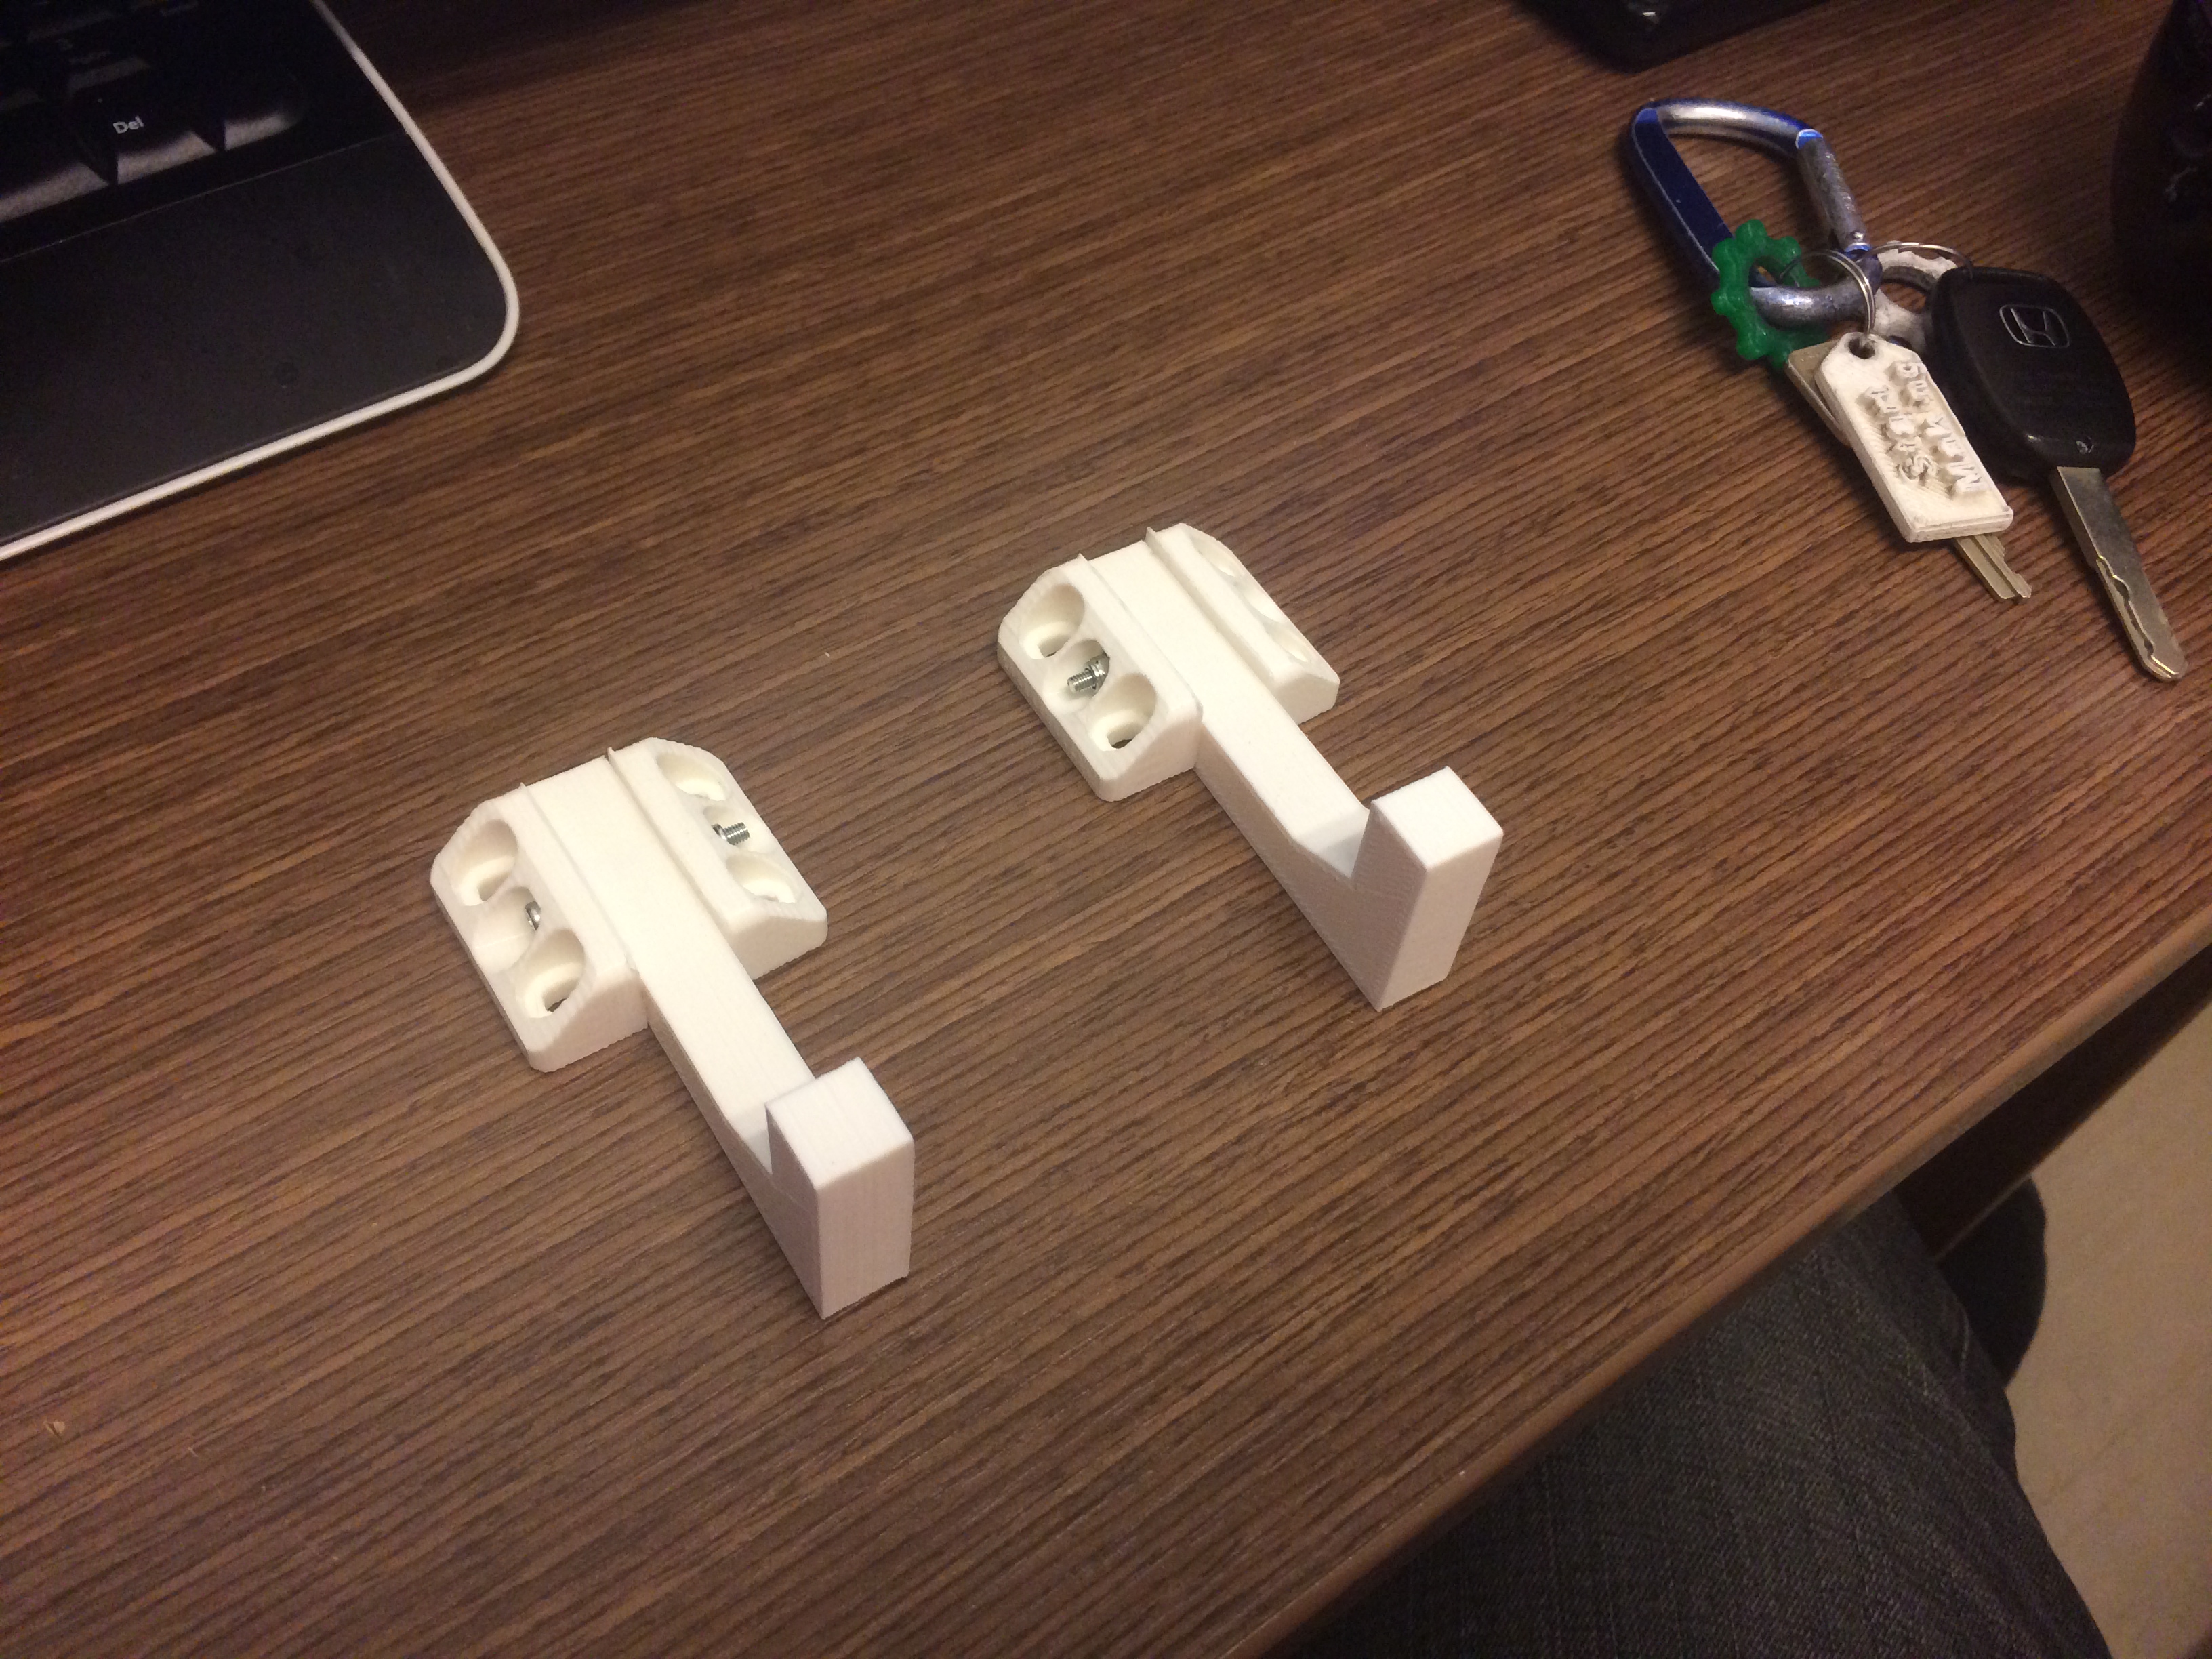
These are the right angle brackets that will hold the closing-edge of my laptop.
This is a picture mid-print on the Rear Angled components. You can see there is approximately a 20% Plastic to 80% Air ratio for infill. This conserves plastic while maintaining most structural integrity.
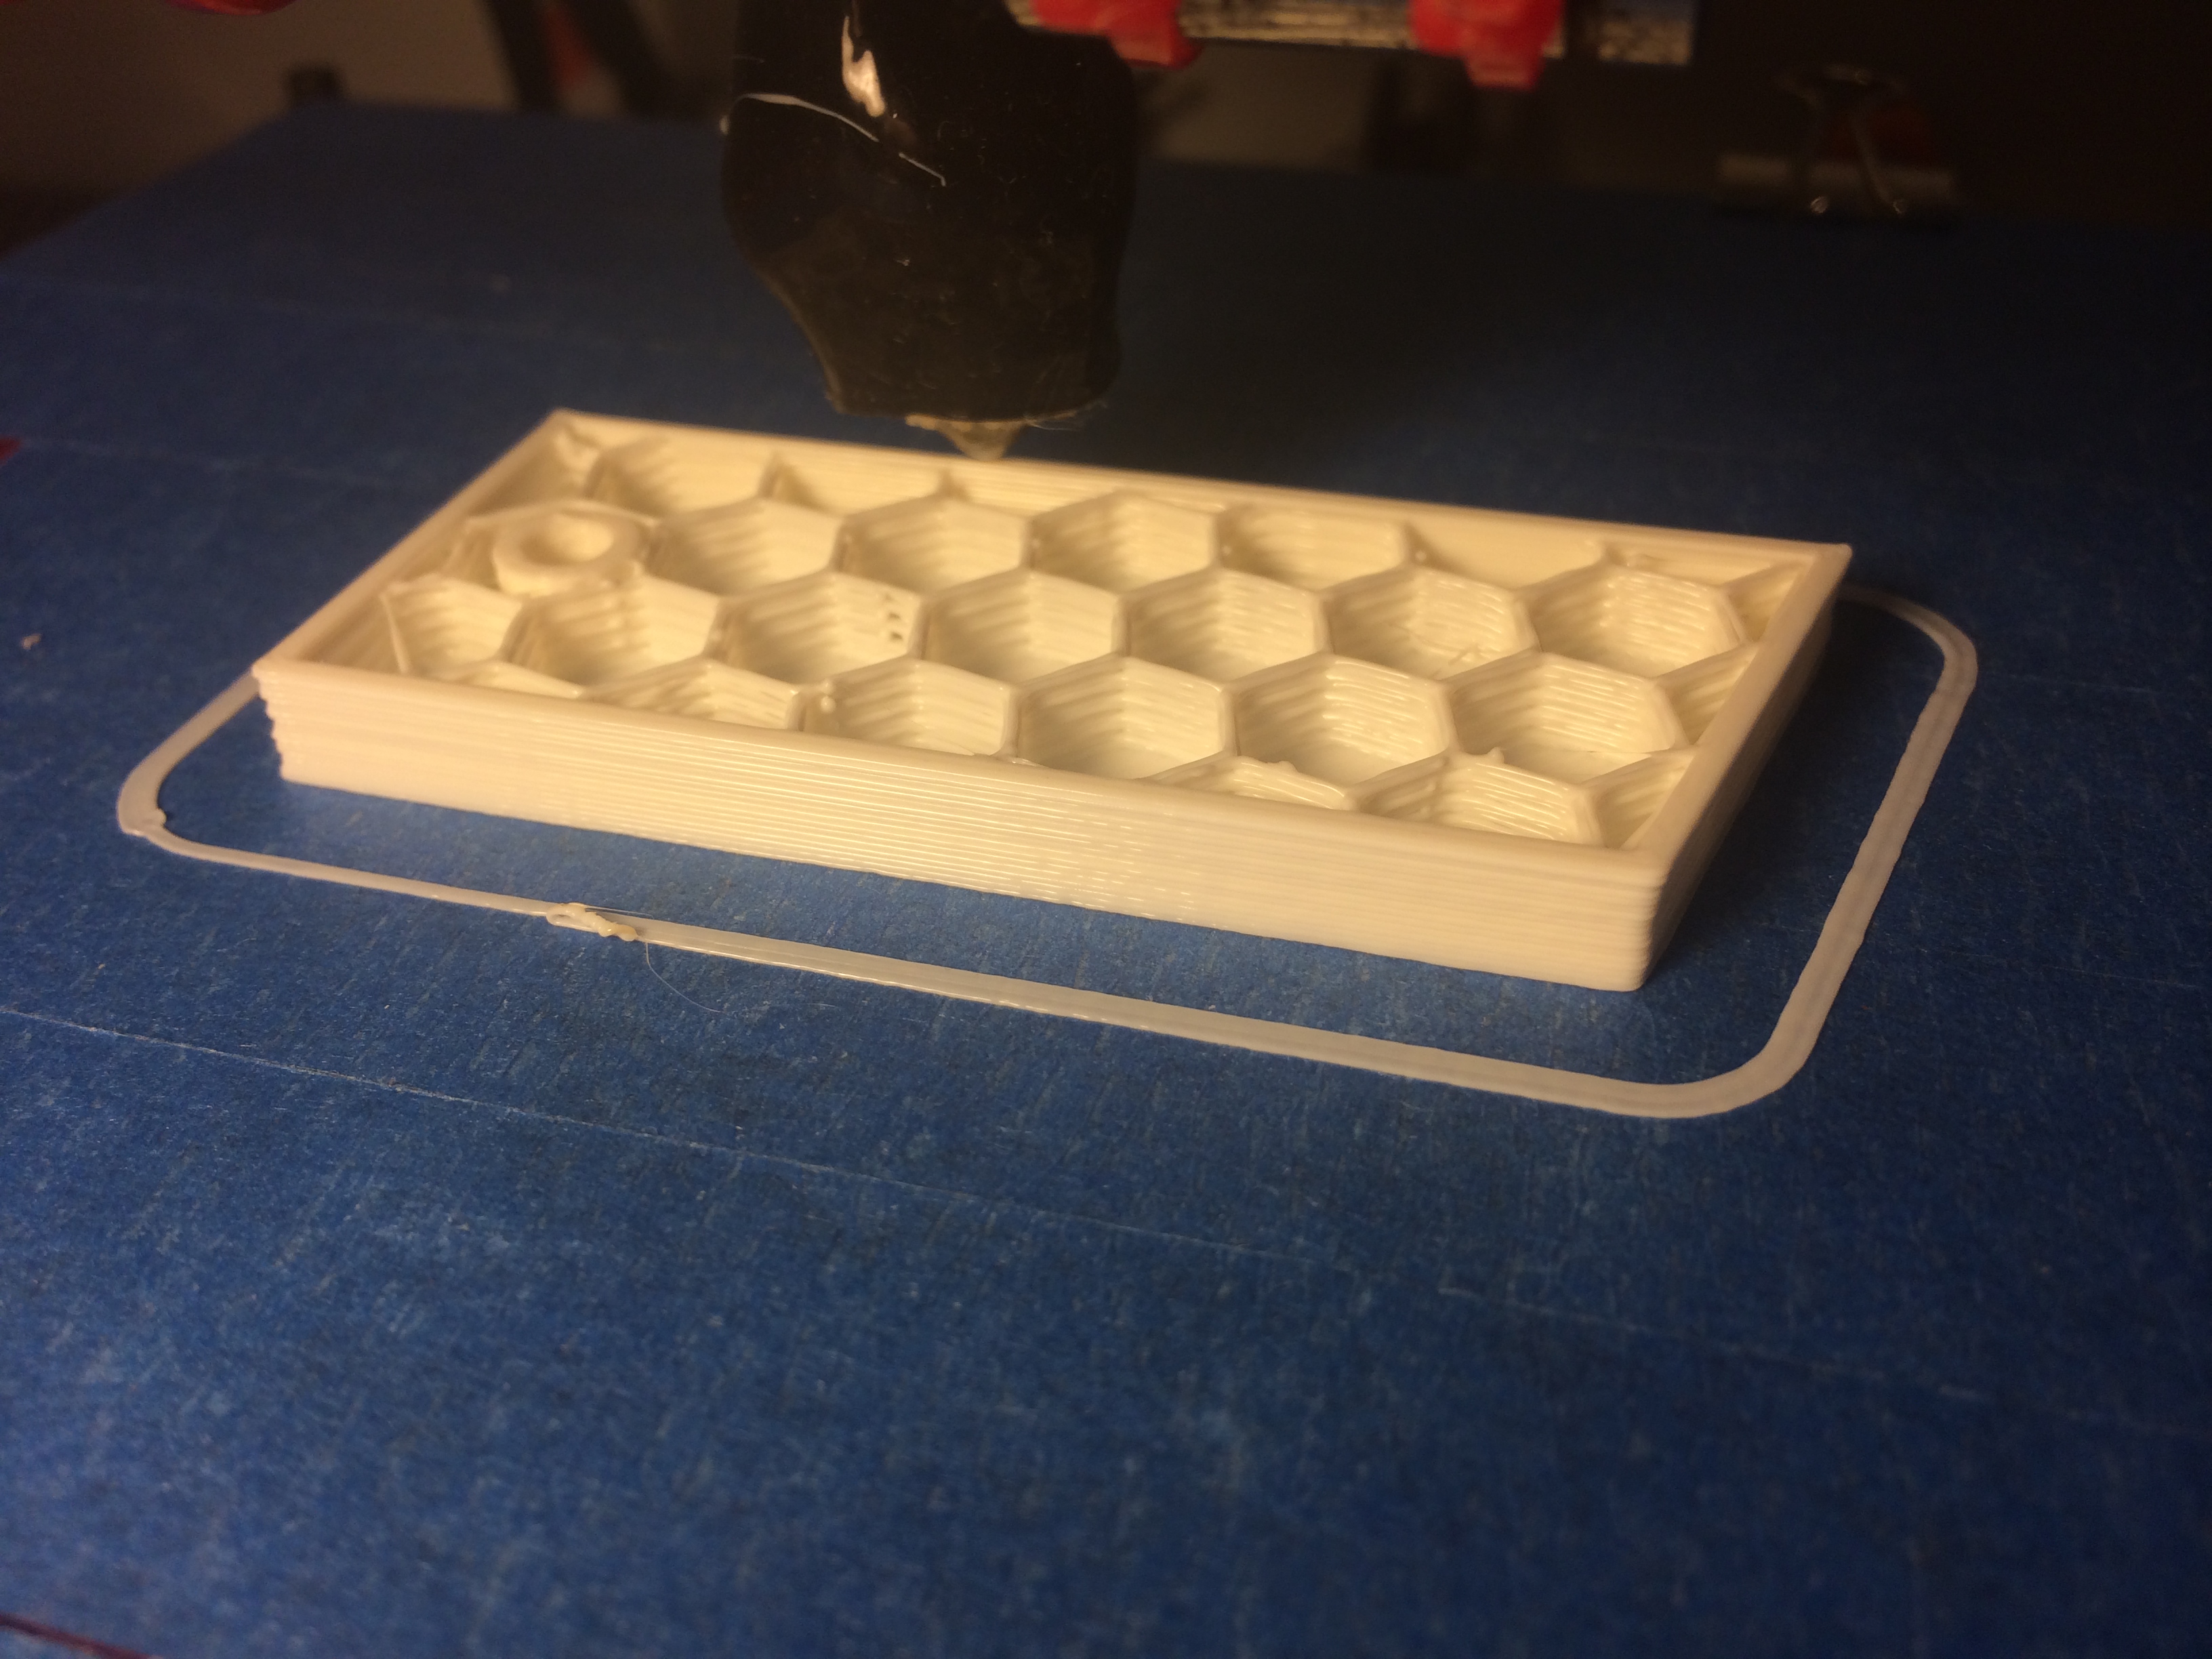
This is a picture mid-print on the Rear Angled components. You can see there is approximately a 20% Plastic to 80% Air ratio for infill. This conserves plastic while maintaining most structural integrity.
After measuring the separation of the rubber grommets on the bottom of my computer, I placed the first pair of brackets onto the Medium Density Fiber (MDF) Board. I use MDF for a lot of my projects as it has a very high manufacturing standard for being very straight.
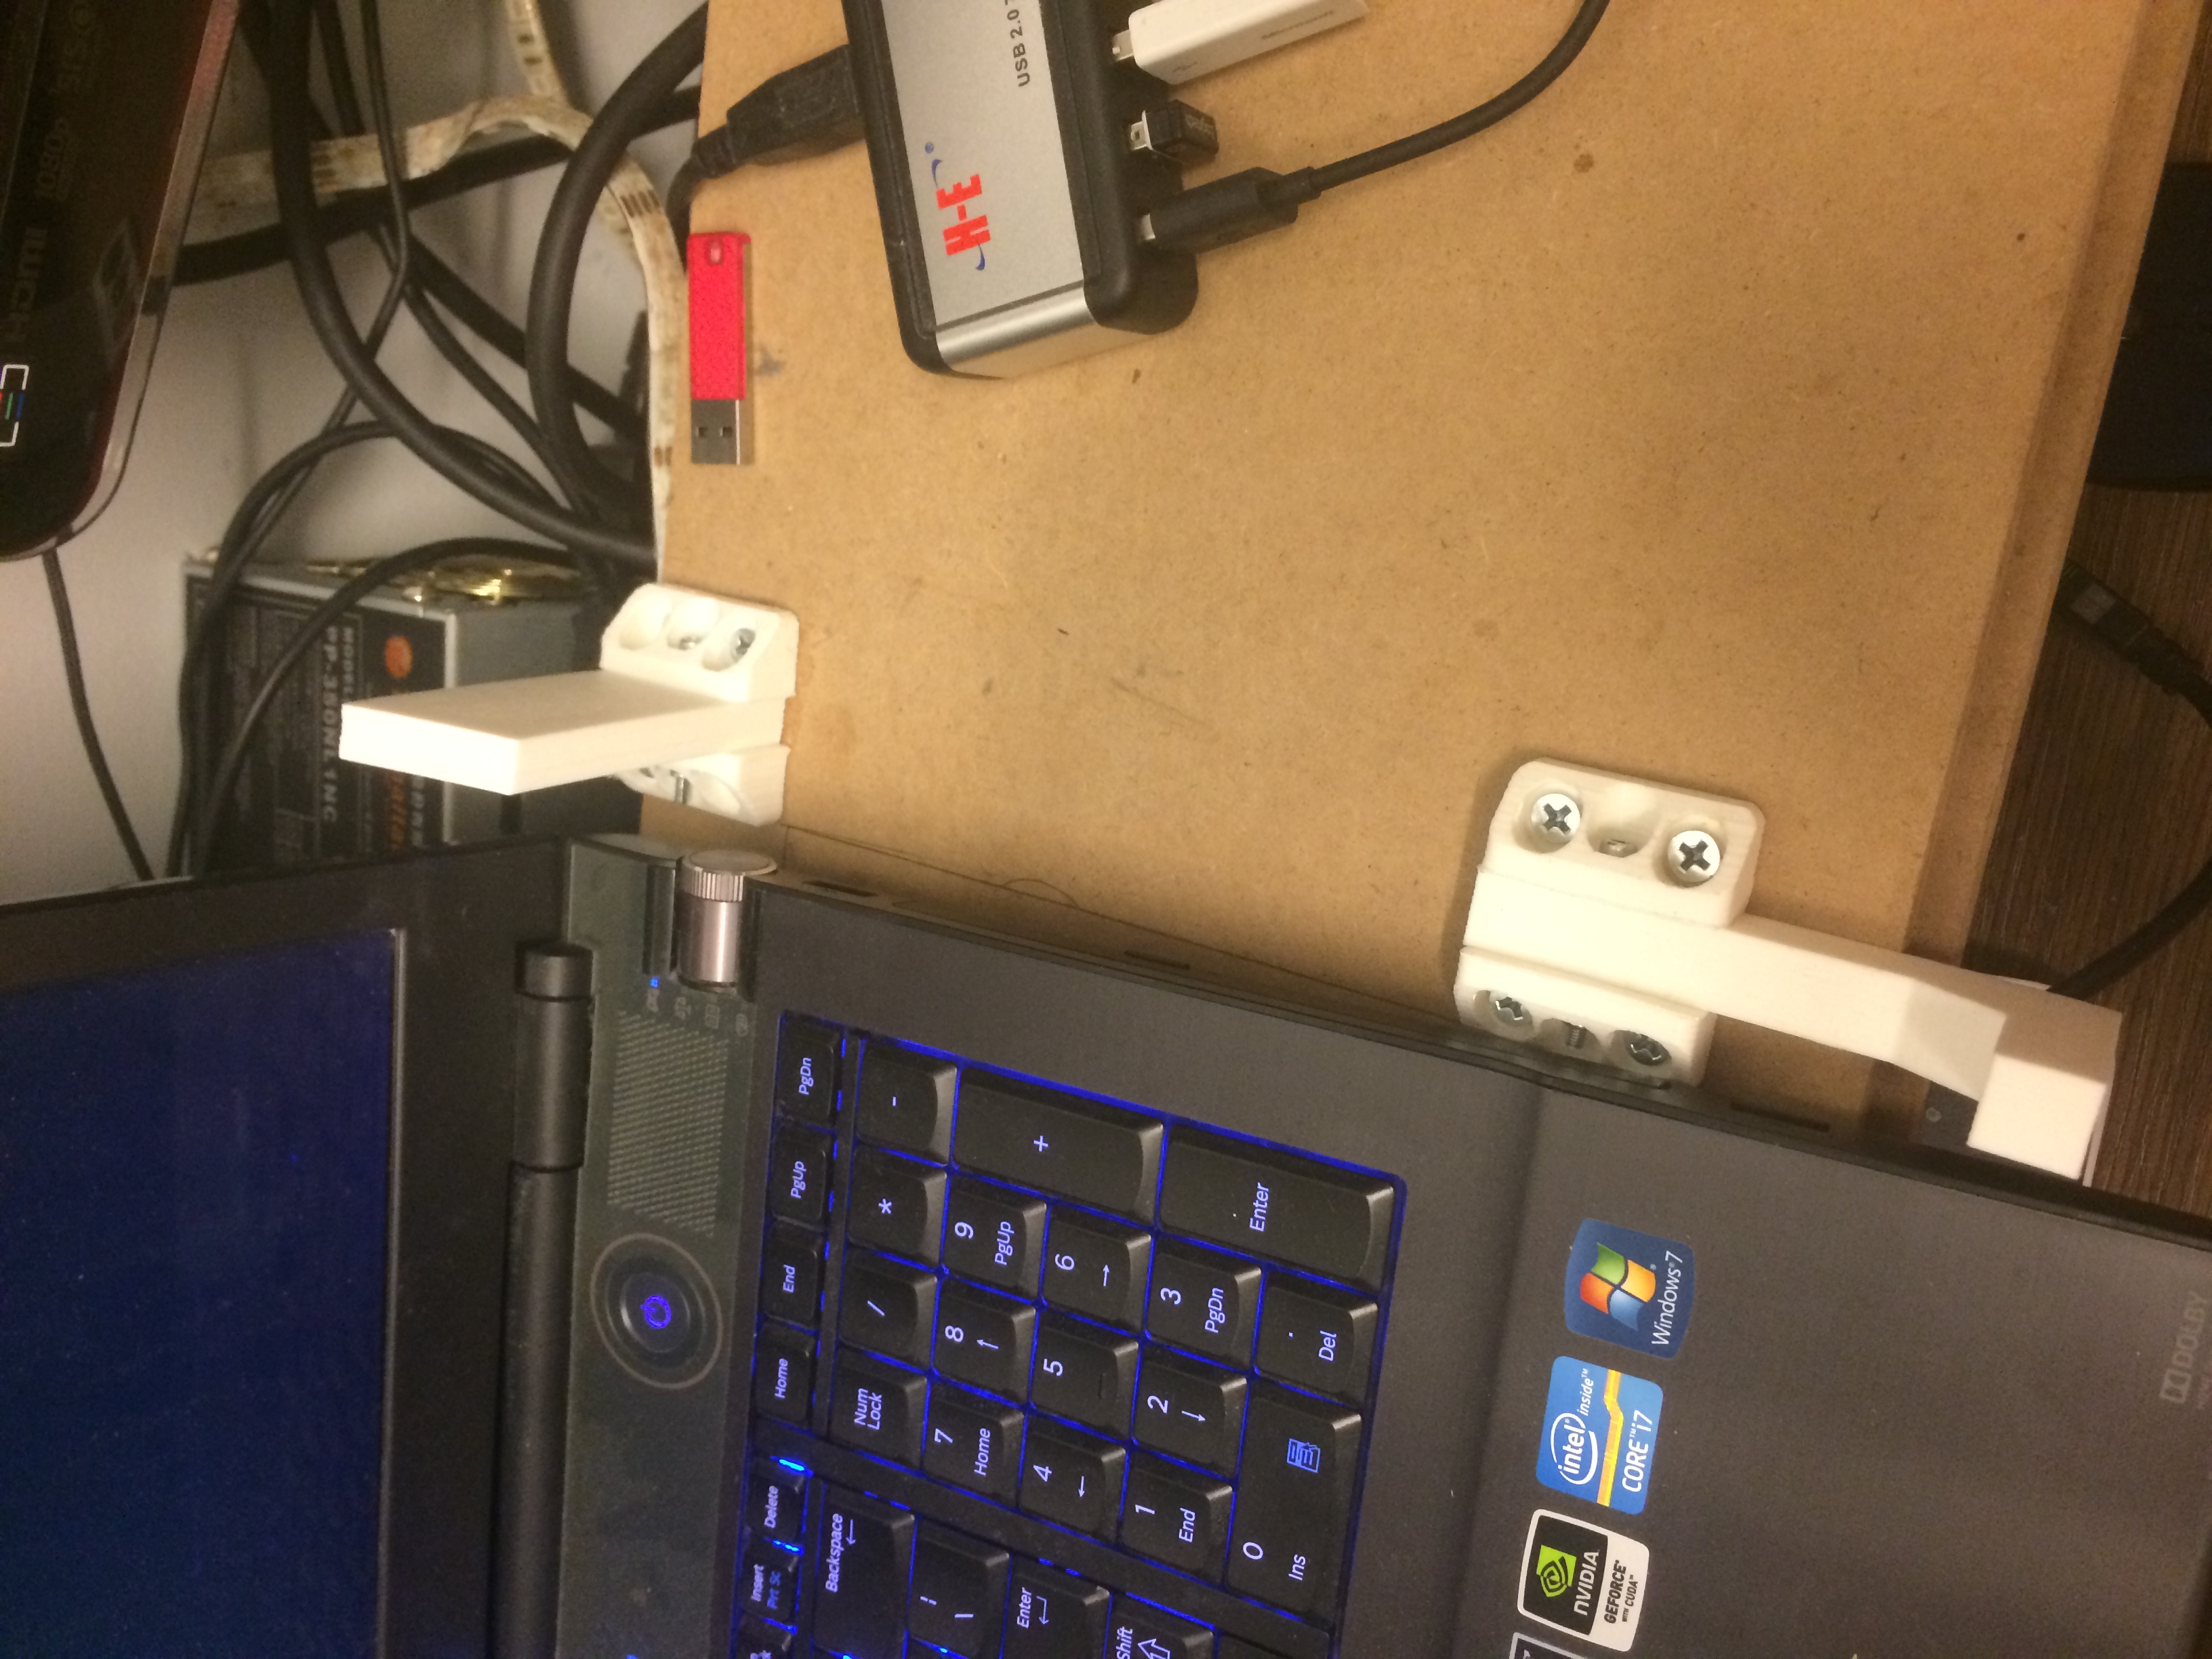
After measuring the separation of the rubber grommets on the bottom of my computer, I placed the first pair of brackets onto the Medium Density Fiber (MDF) Board. I use MDF for a lot of my projects as it has a very high manufacturing standard for being very straight.
All 4 Brackets are in place. The front two prevent the laptop from falling forward, while the back two elevate the rear of the computer for better airflow, and centering my computer screen with my external monitors.
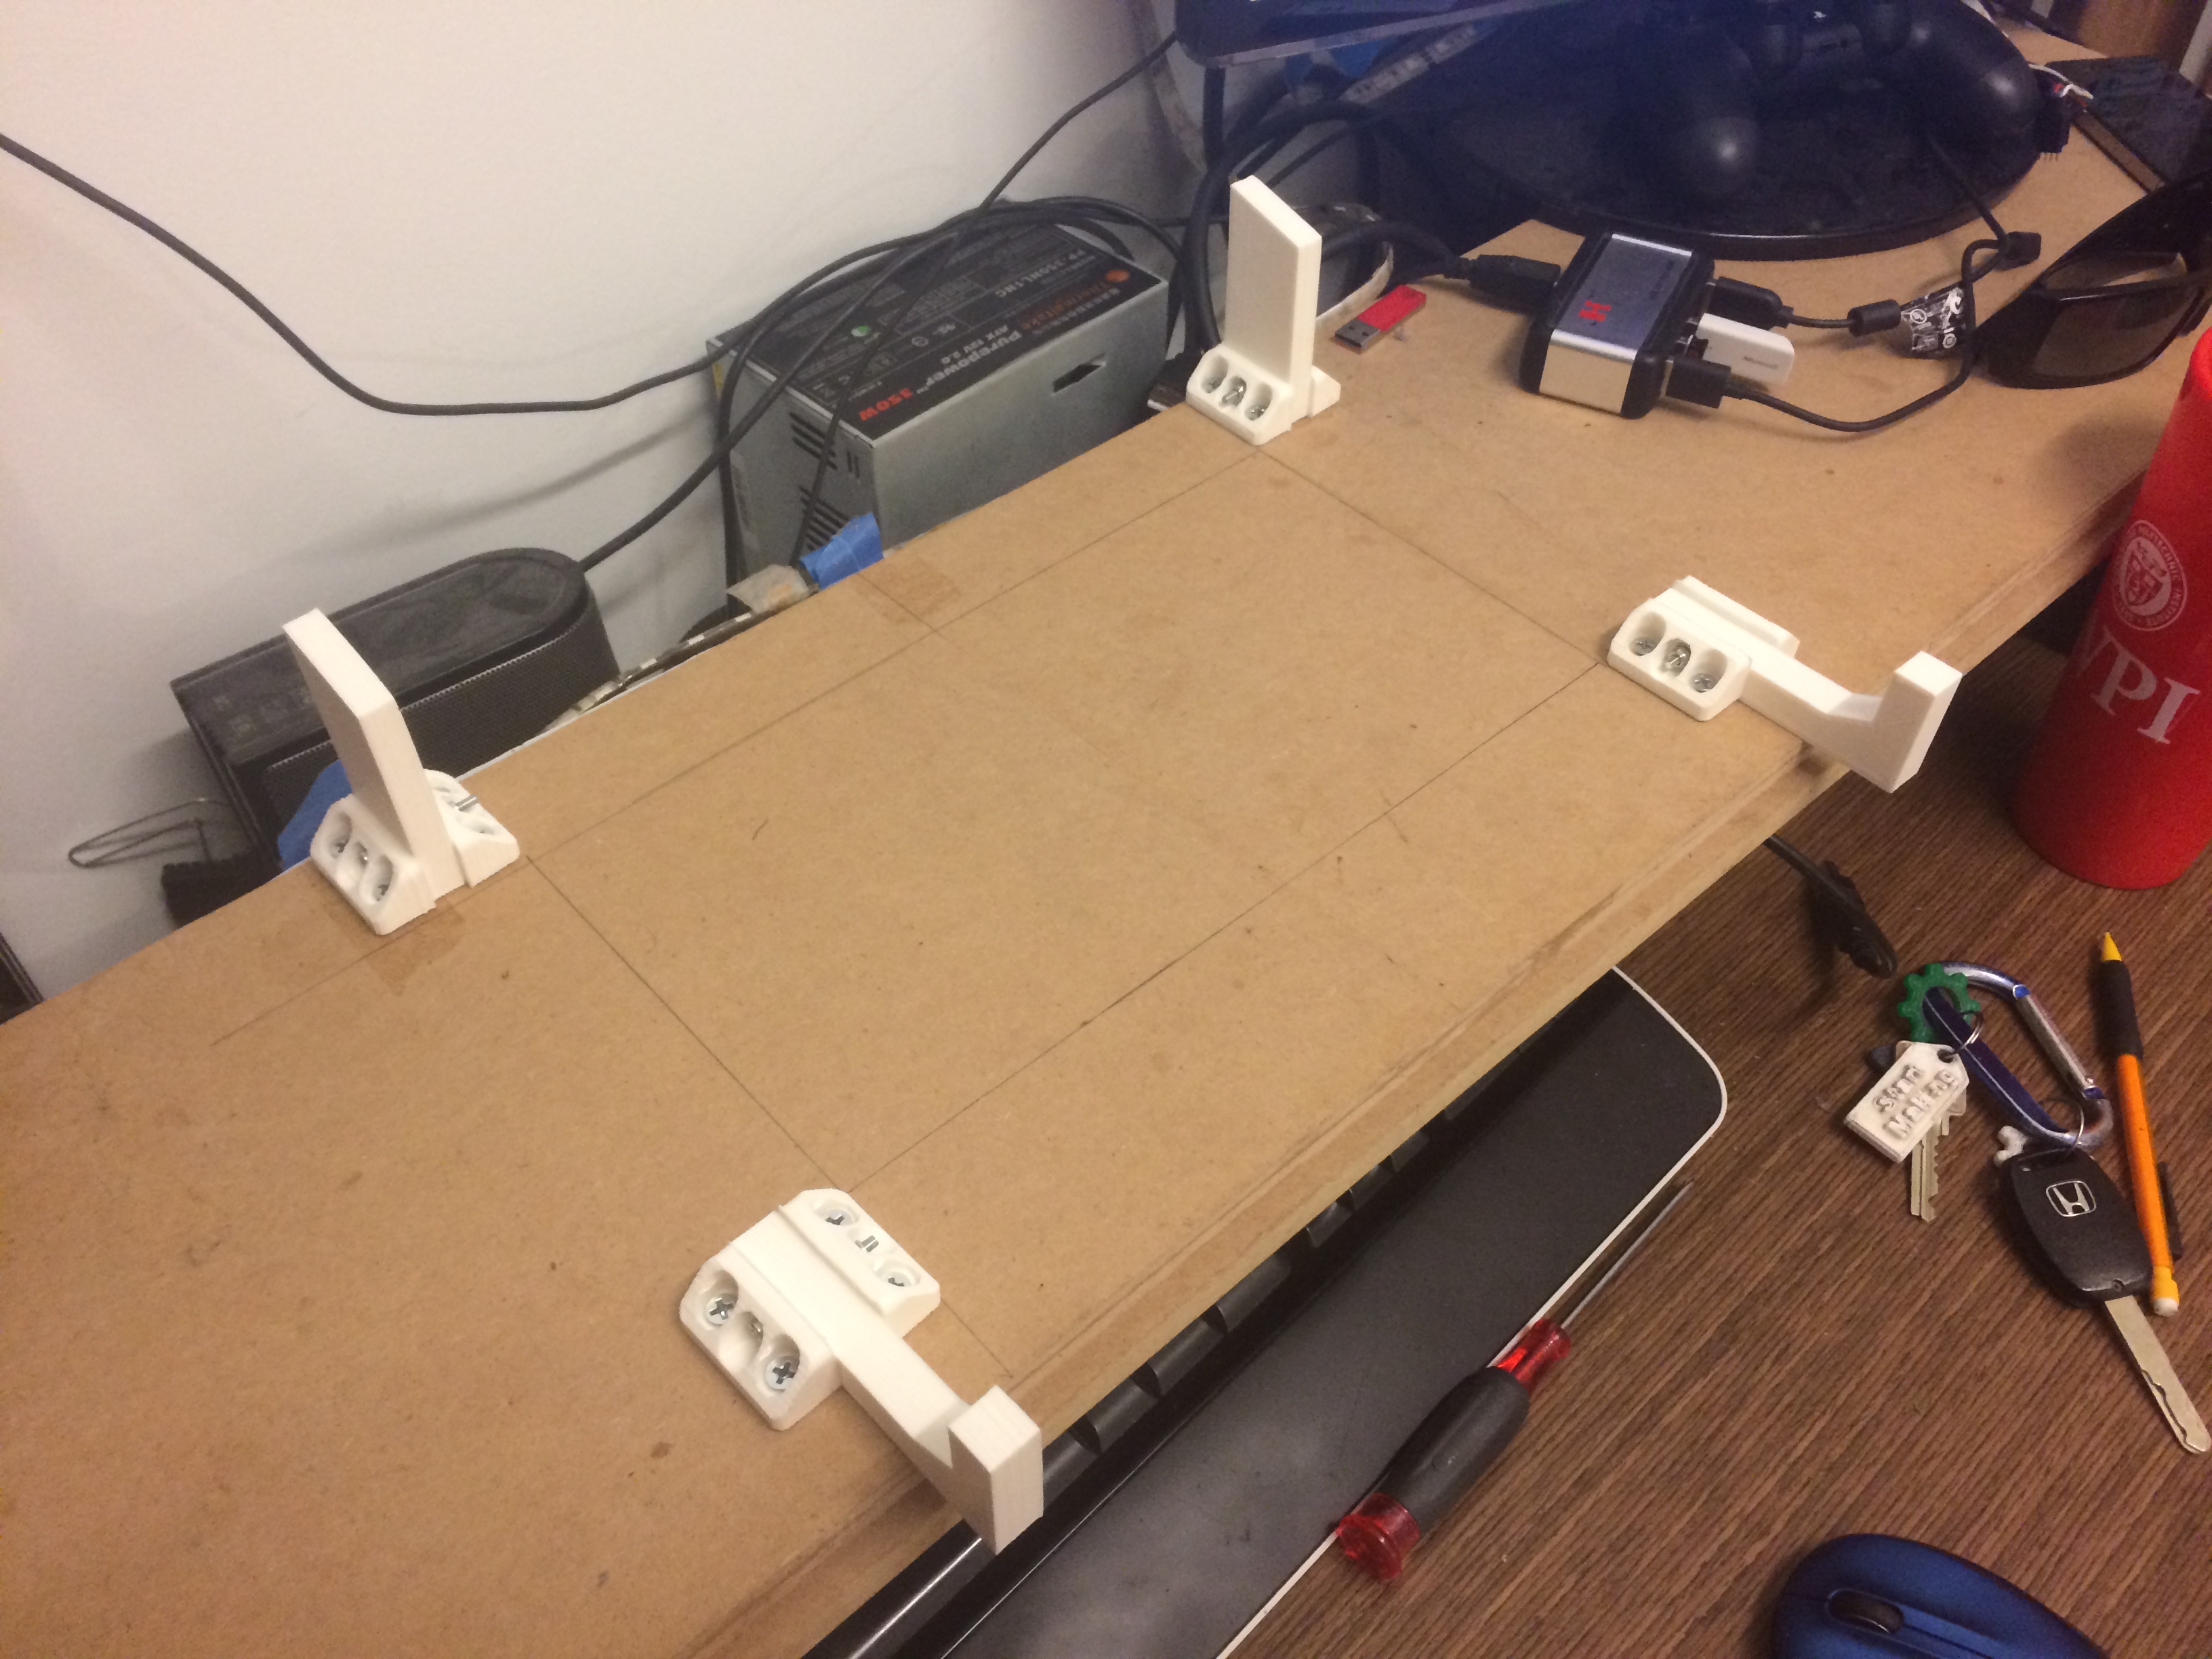
All 4 Brackets are in place. The front two prevent the laptop from falling forward, while the back two elevate the rear of the computer for better airflow, and centering my computer screen with my external monitors.
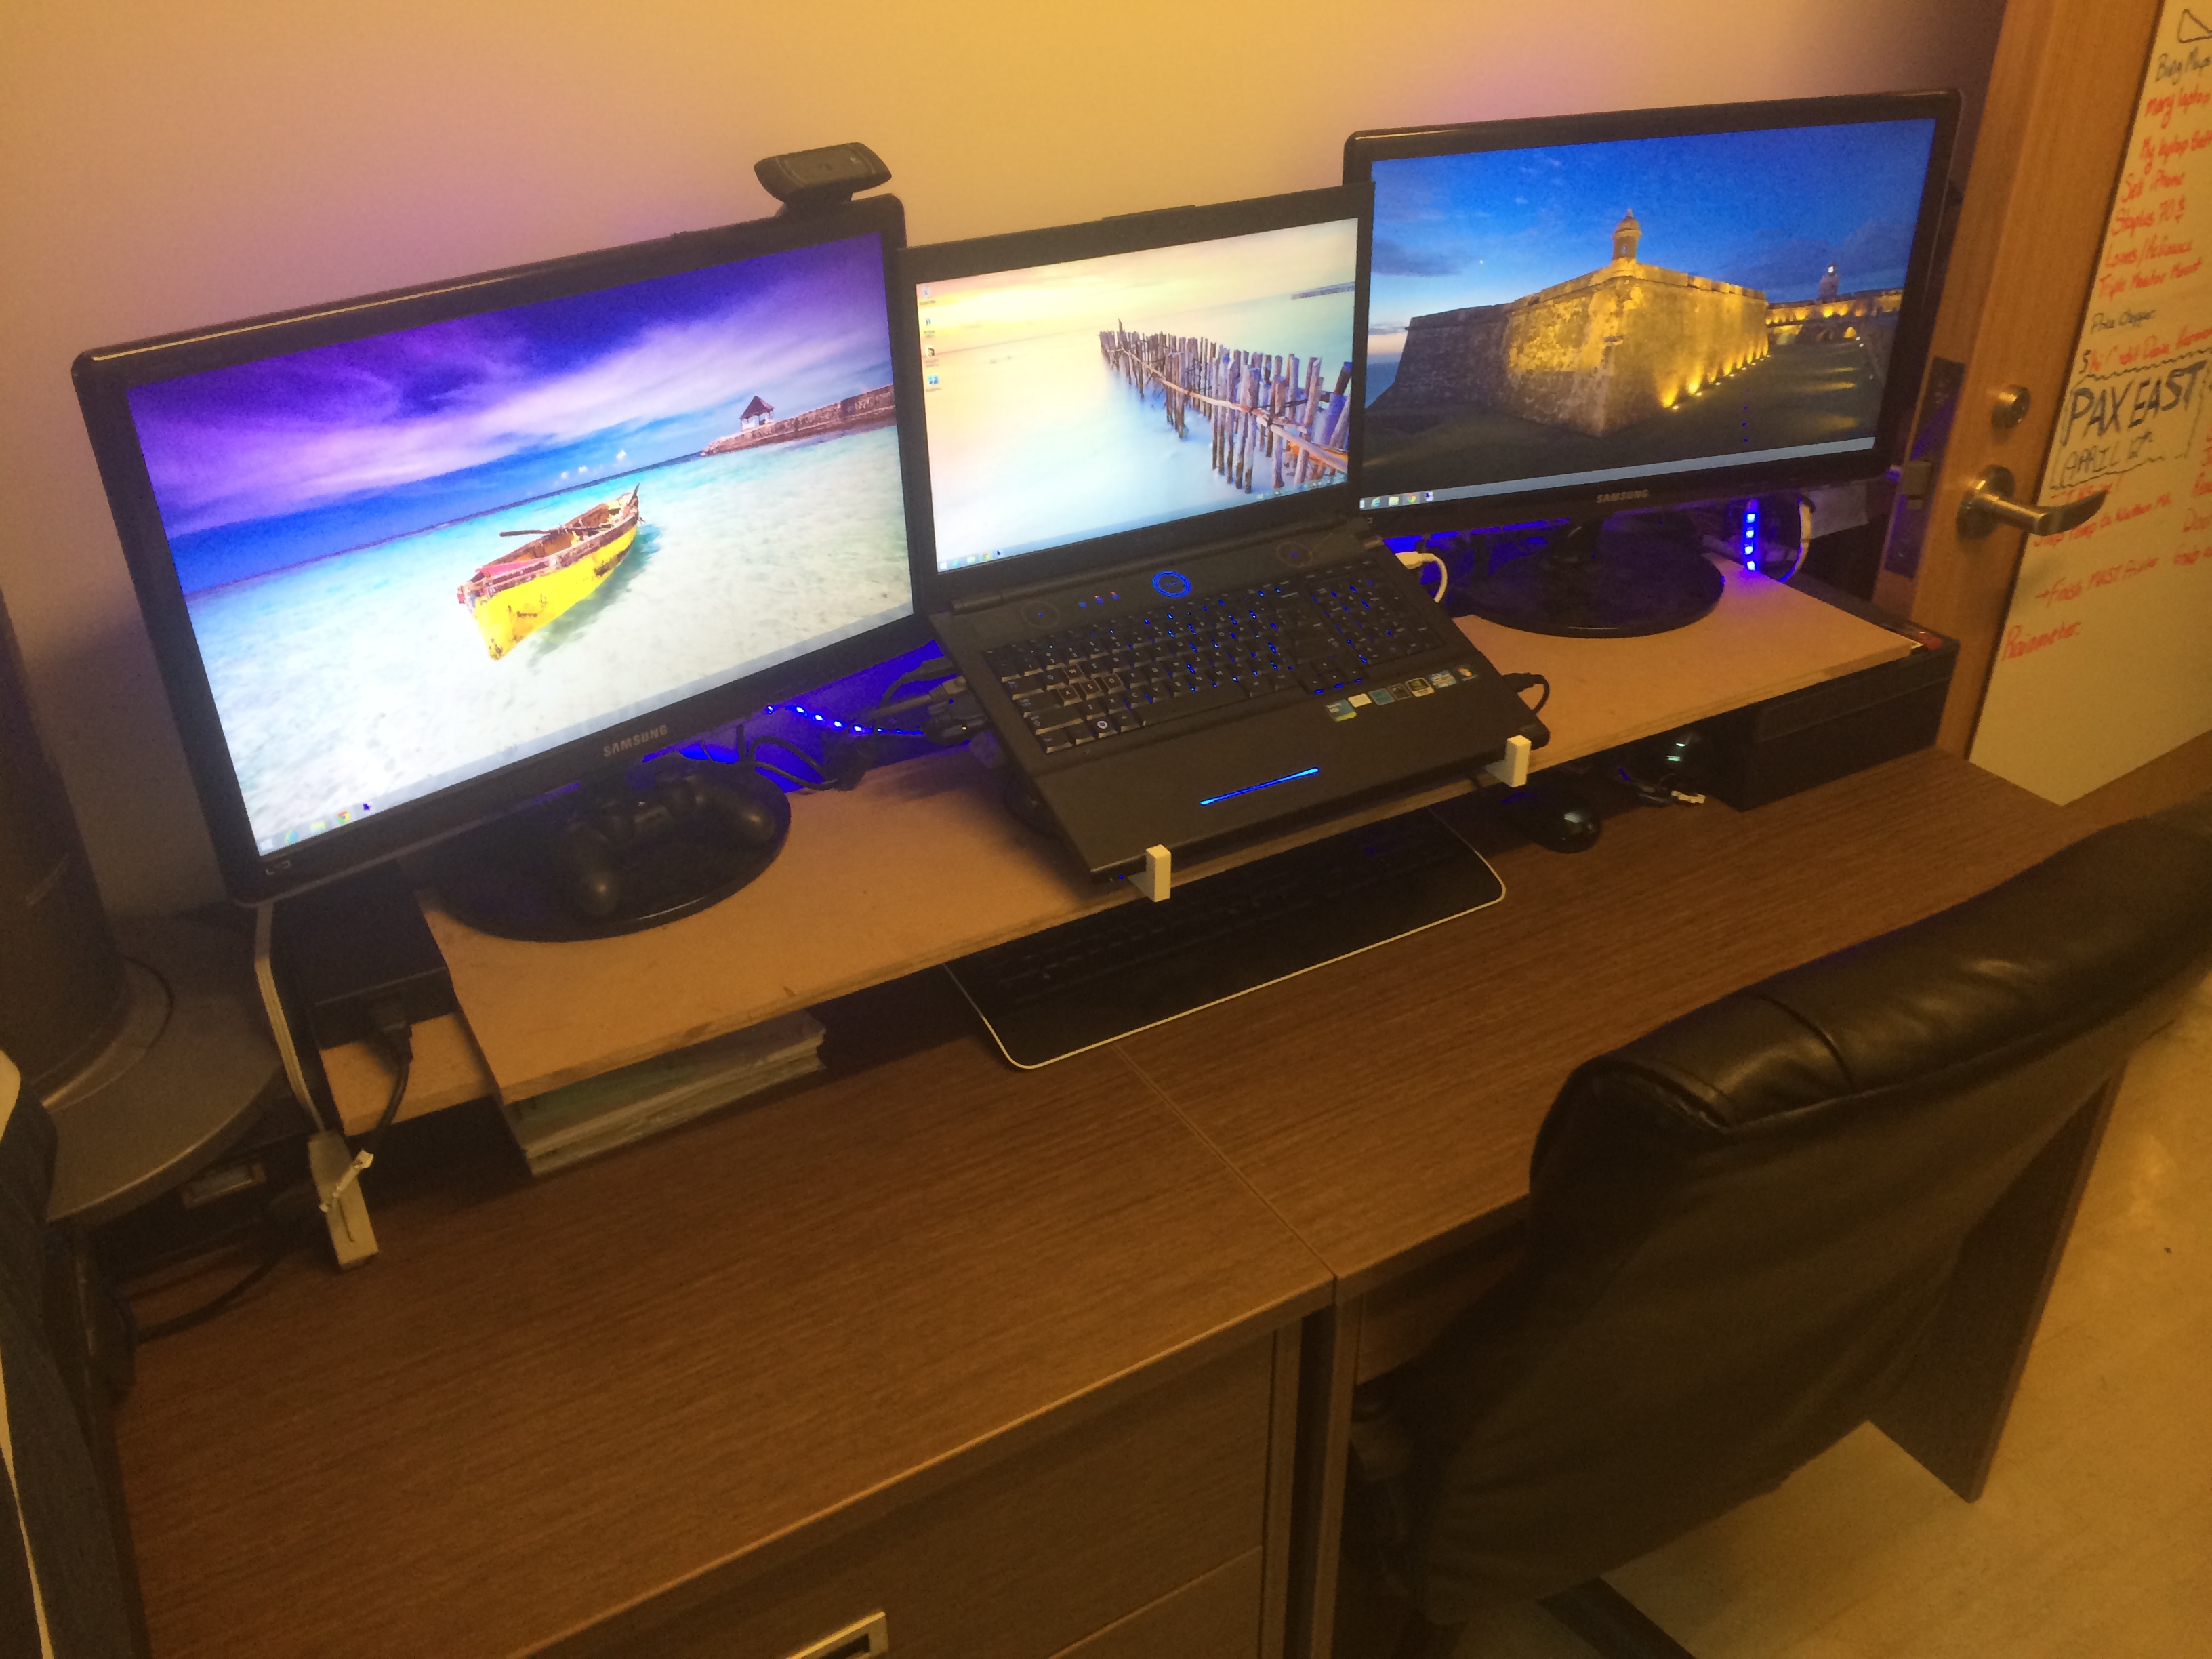
Laptop was placed on the brackets, and everything looks great! The Laptop Screen now sits in the middle of the other monitors creating a nice panorama effect at eye-level.
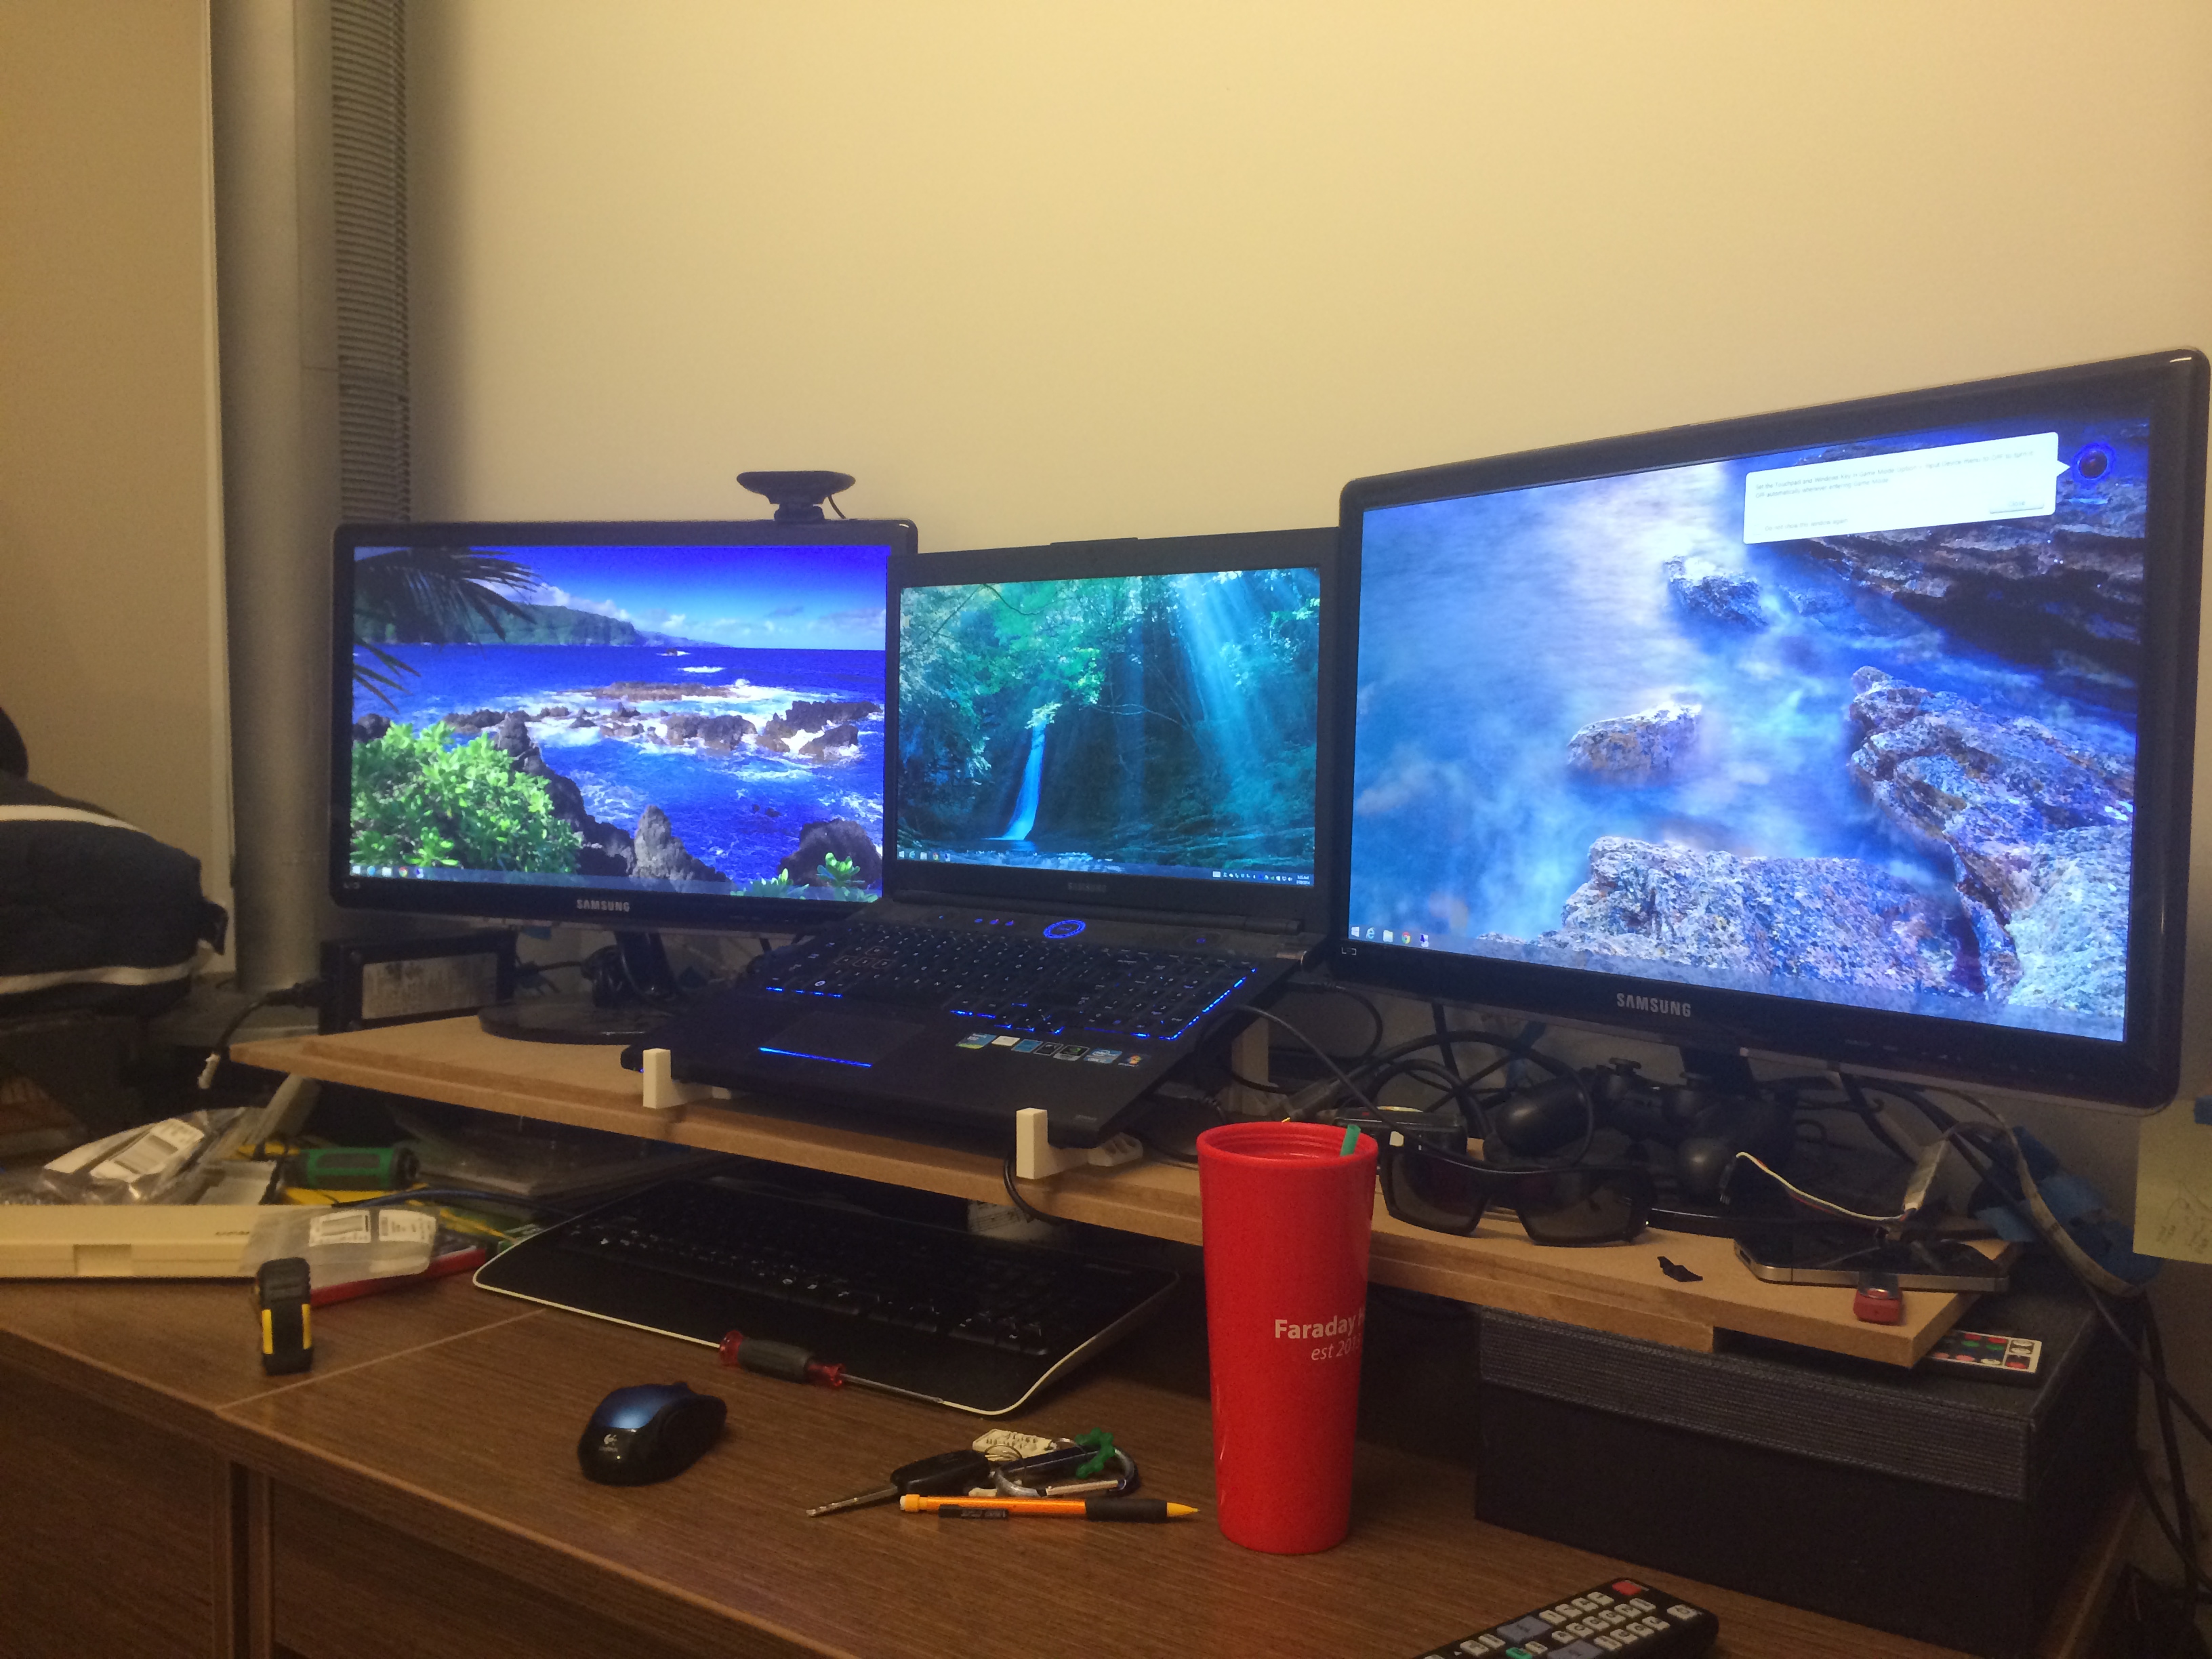
Laptop was placed on the brackets, and everything looks great! The Laptop Screen now sits in the middle of the other monitors creating a nice panorama effect at eye-level.
Here you can see the increased elevation of the laptop which allows more airflow underneath it. This has directly contributed to better performance on my machine. I was measuring 4-7 Degrees Celcius in normal conditions and slightly higher frame rate.
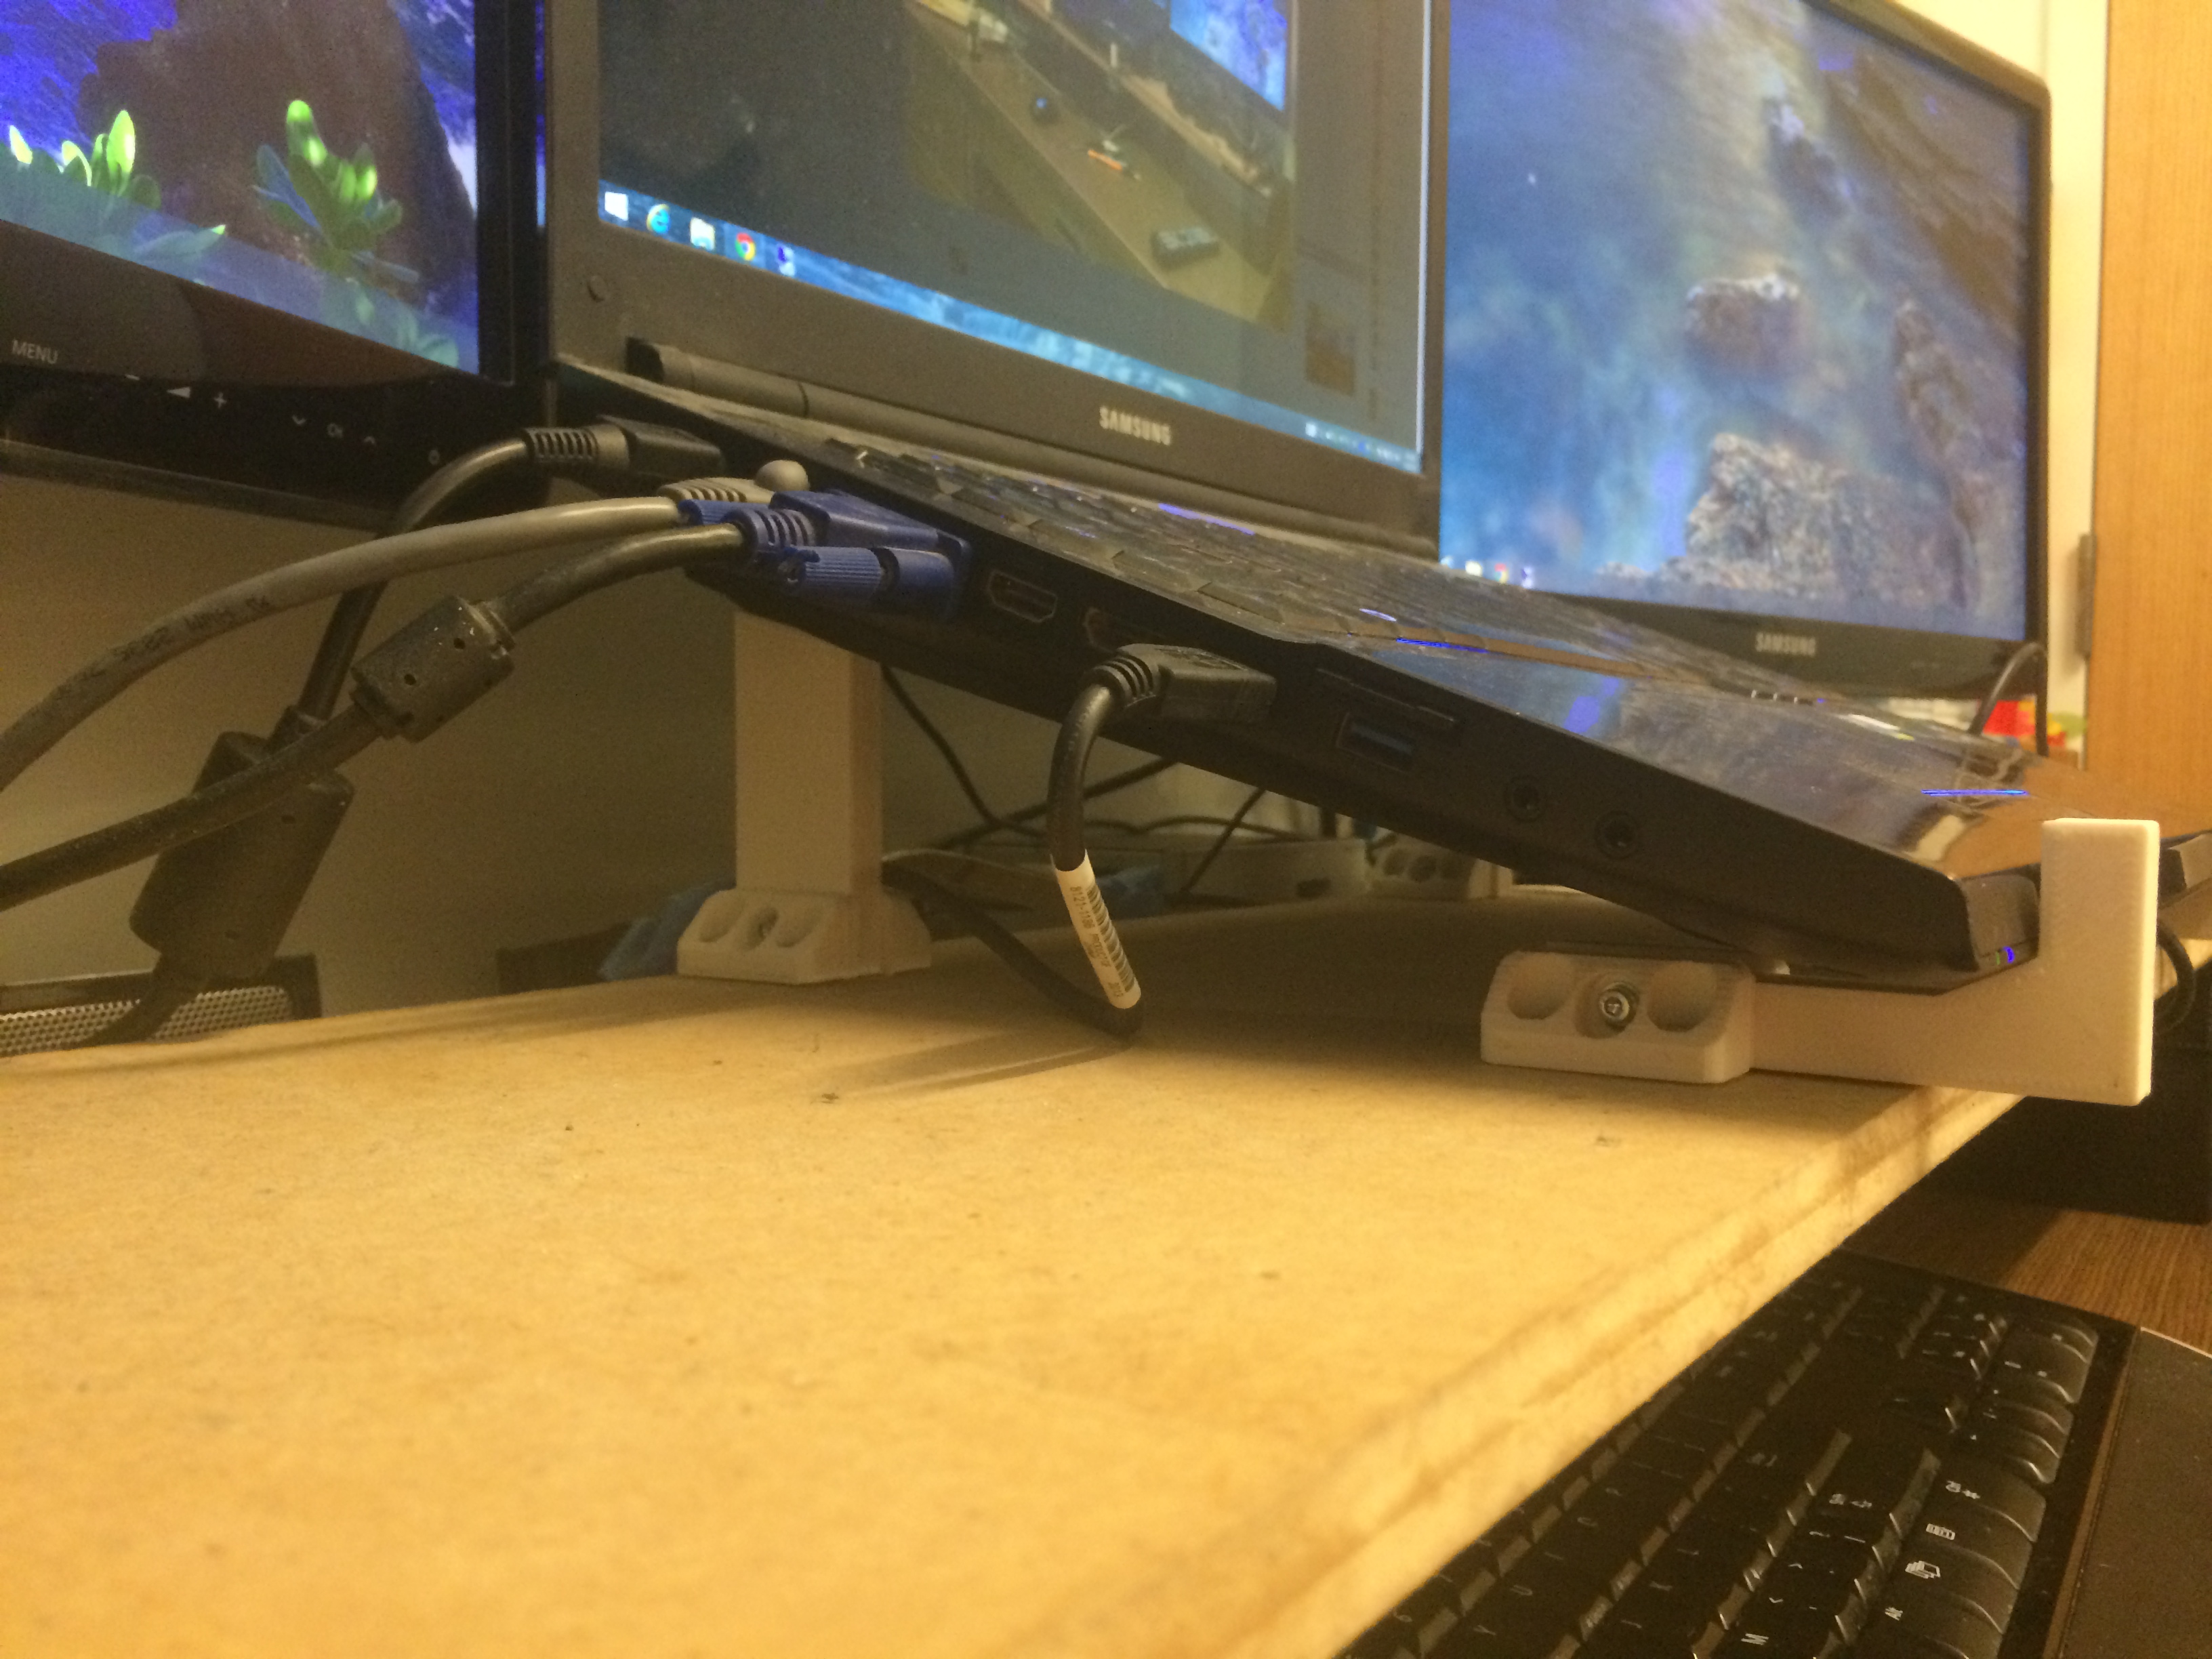
Here you can see the increased elevation of the laptop which allows more airflow underneath it. This has directly contributed to better performance on my machine. I was measuring 4-7 Degrees Celcius in normal conditions and slightly higher frame rate.
Here you can admire the centering of all the monitors. I measured everything out in AutoCAD to find the optimal height to print the rear brackets. The backlit keys are also more aesthetically pleasing where visible at an angle as opposed to flat. Speakers also sound better slightly angled towards the user.

Here you can admire the centering of all the monitors. I measured everything out in AutoCAD to find the optimal height to print the rear brackets. The backlit keys are also more aesthetically pleasing where visible at an angle as opposed to flat. Speakers also sound better slightly angled towards the user.
I added some RGB LED's behind the display to span past the edges of the screen, which makes the lighting a little easier on your eyes and make for nice accent lighting.
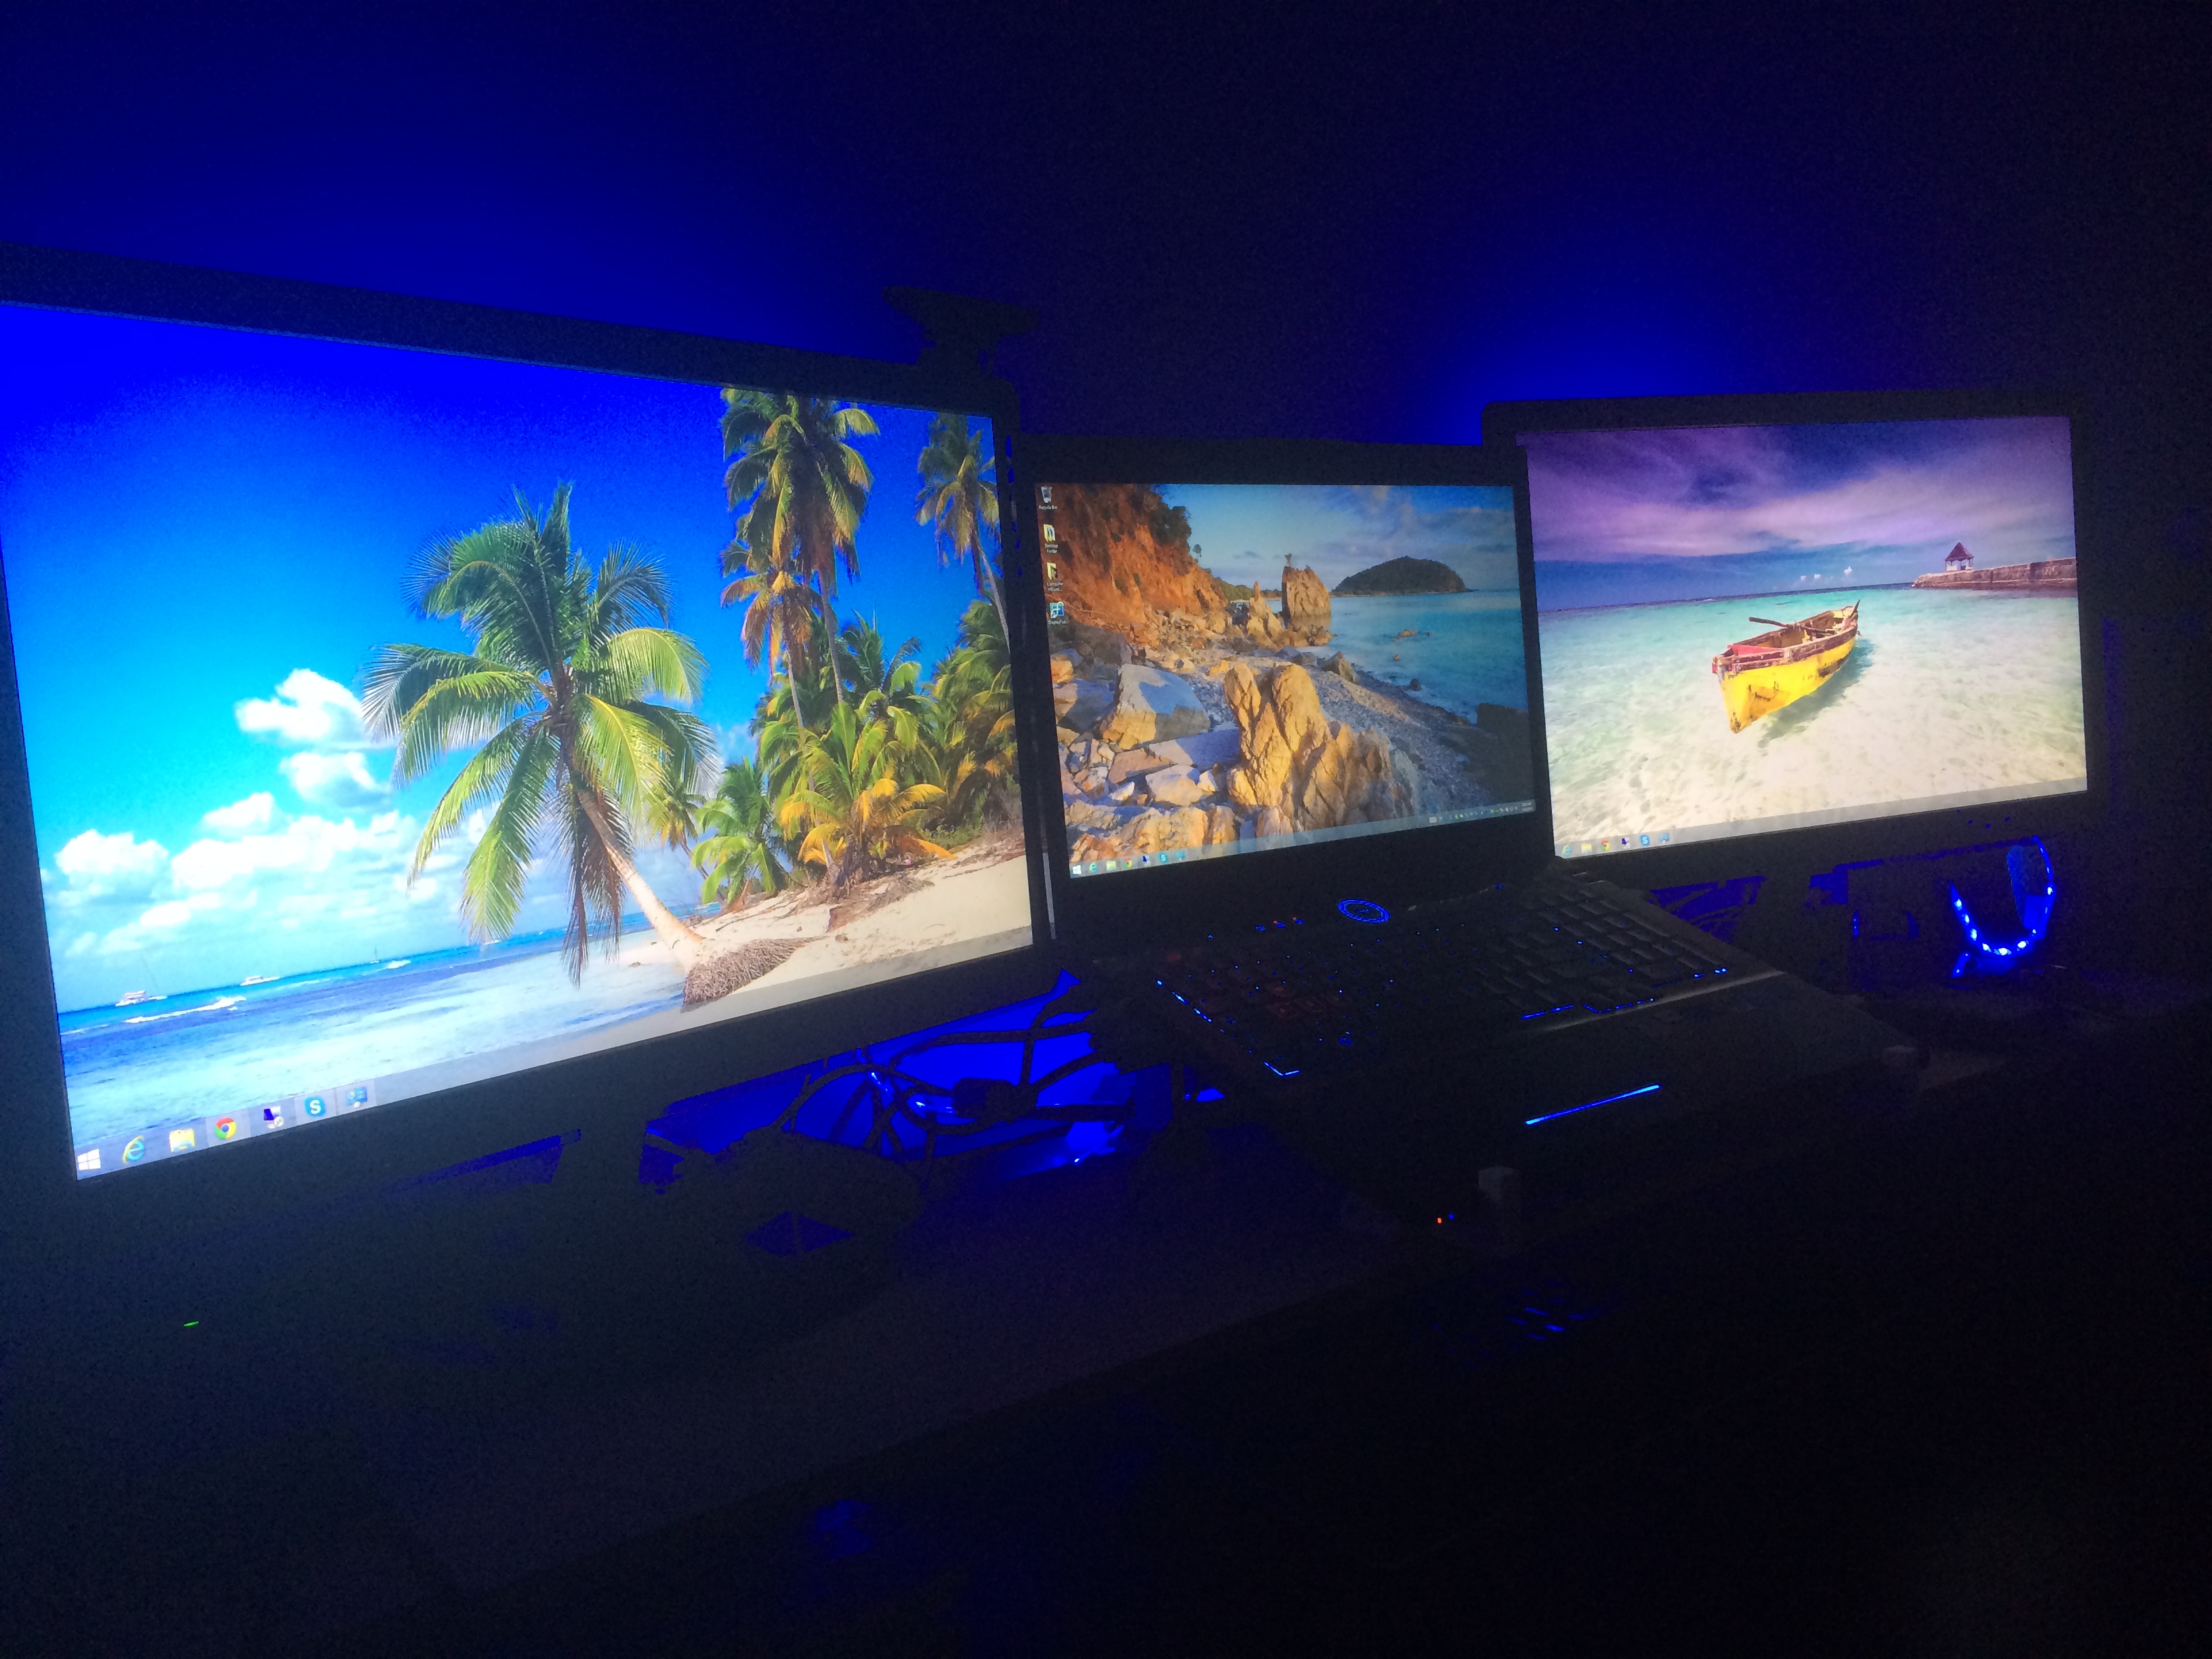
I added some RGB LED's behind the display to span past the edges of the screen, which makes the lighting a little easier on your eyes and make for nice accent lighting.
Another perspective.
Another perspective.
Everything cleaned up with lights on. My Desk is also terraced so I can store my keyboard and mouse underneath so I maintain desk space for paper-work or books.
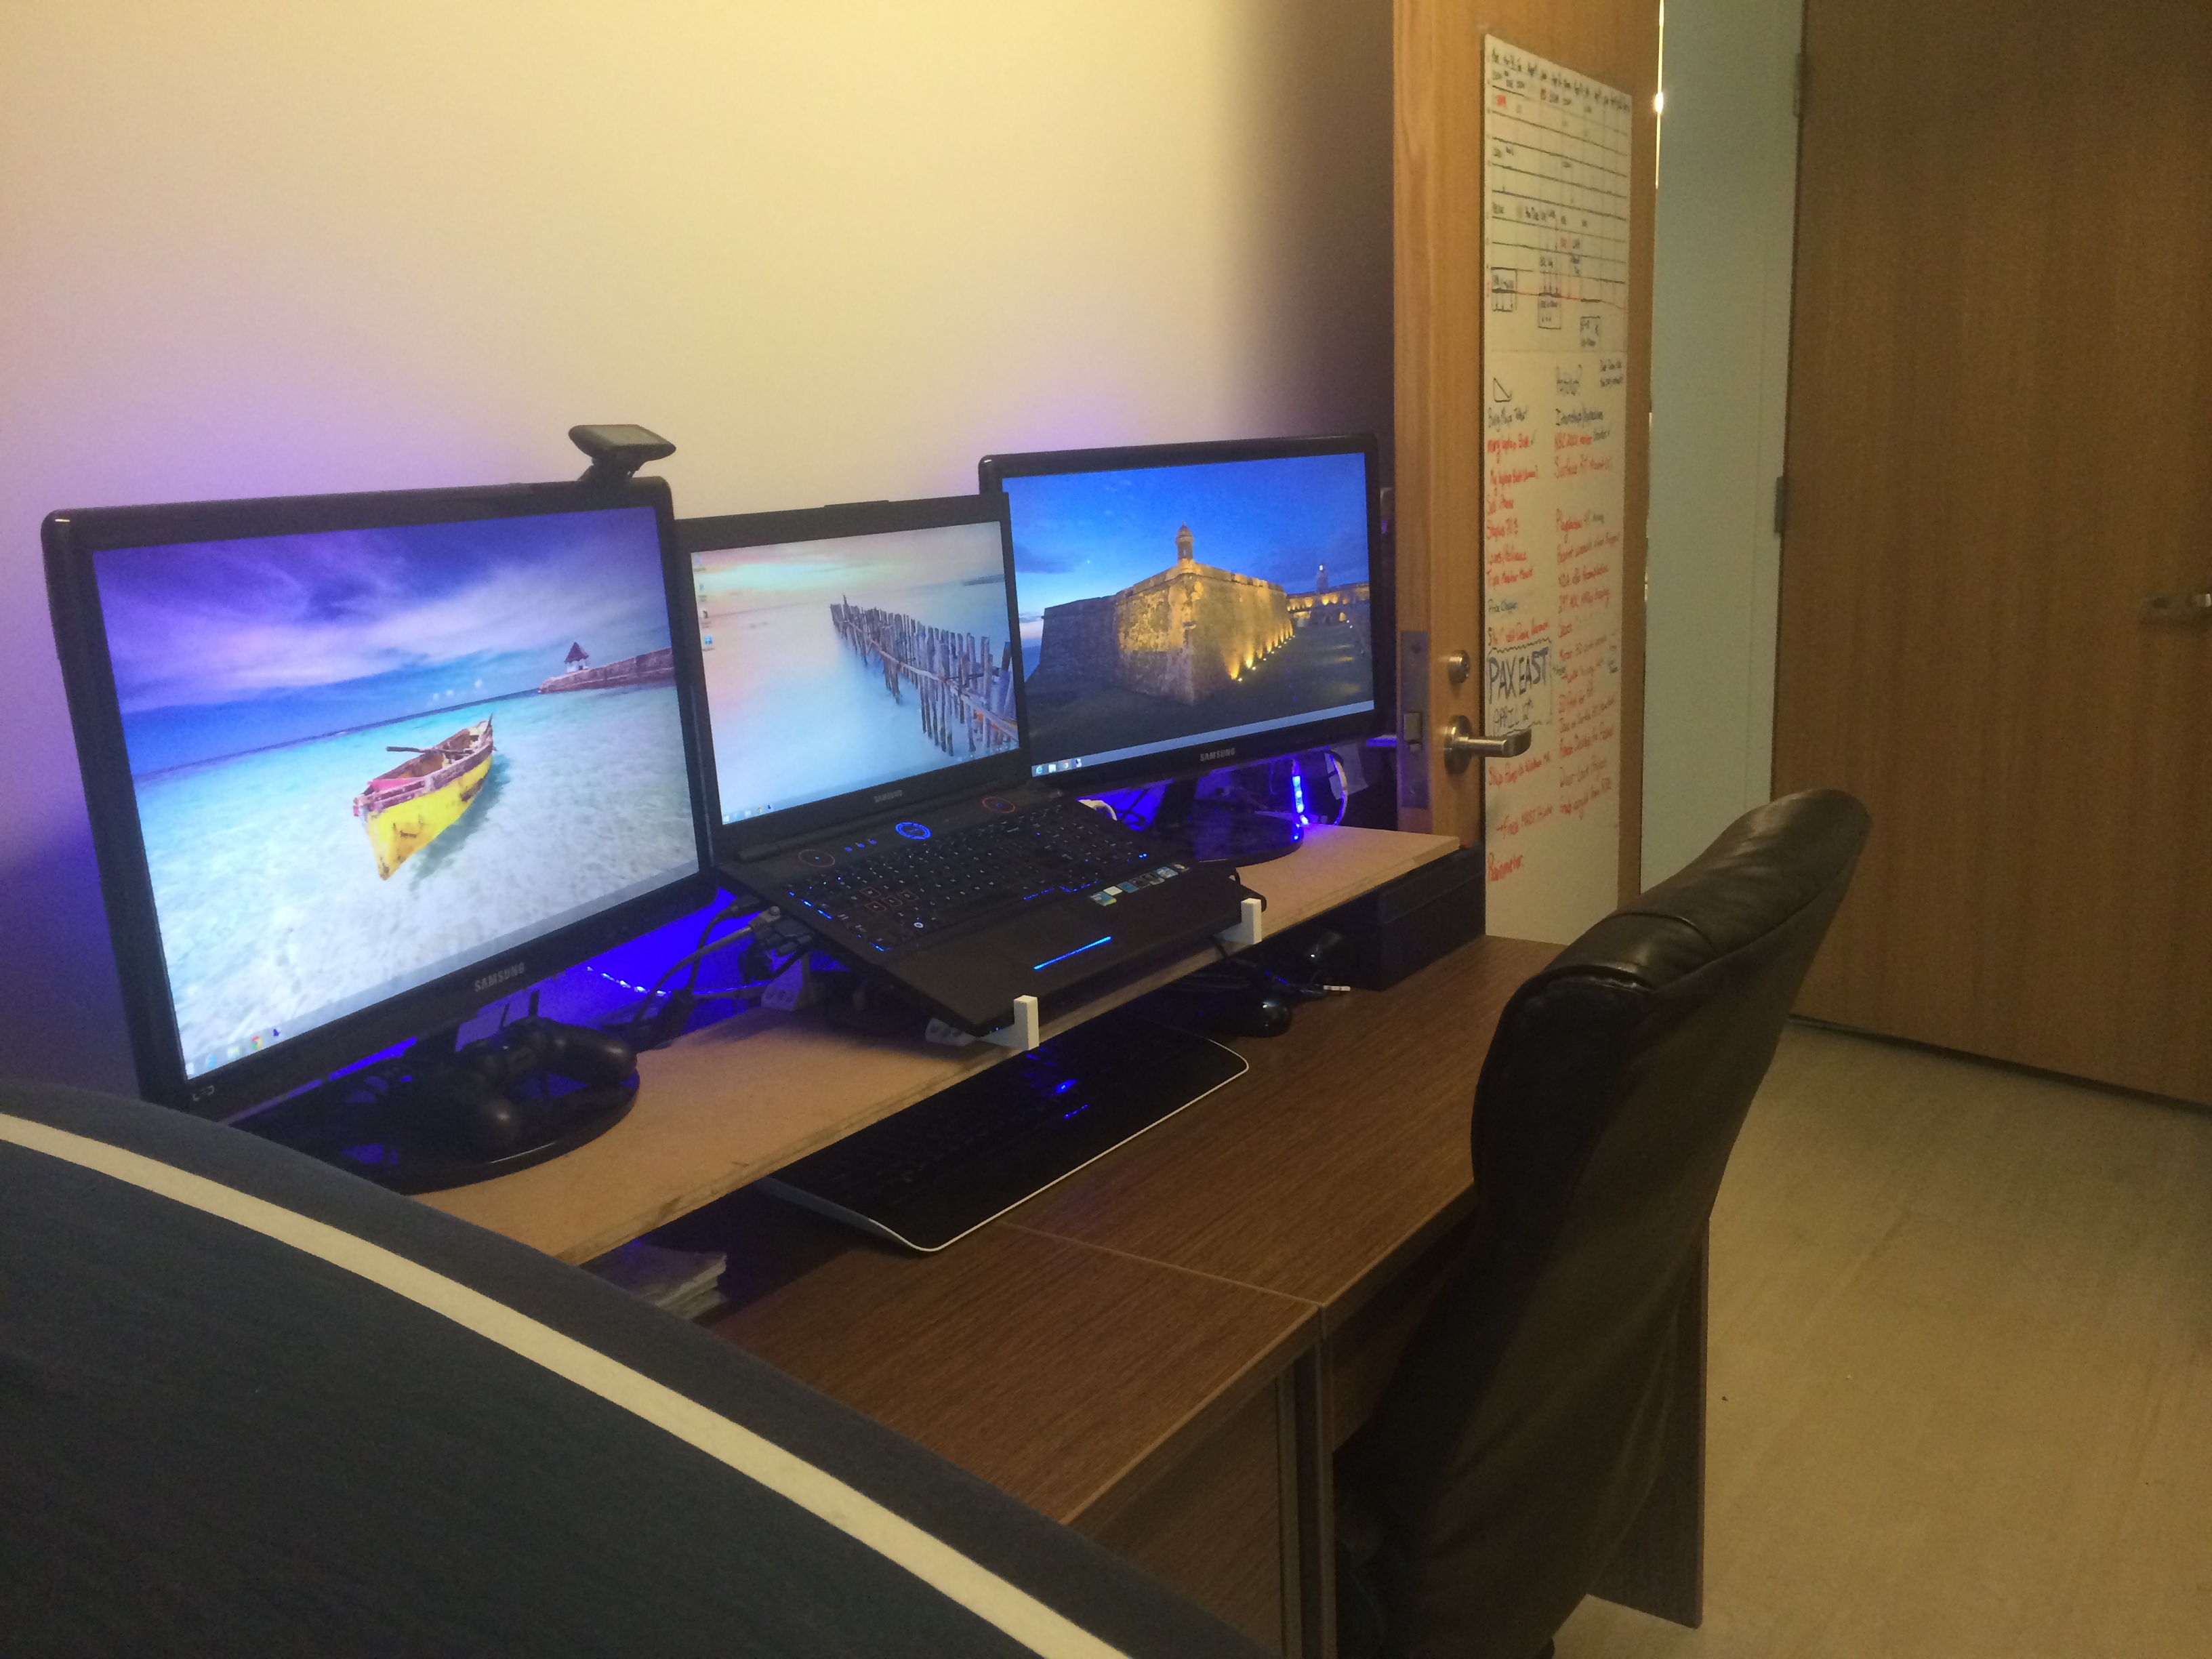
Everything cleaned up with lights on. My Desk is also terraced so I can store my keyboard and mouse underneath so I maintain desk space for paper-work or books.